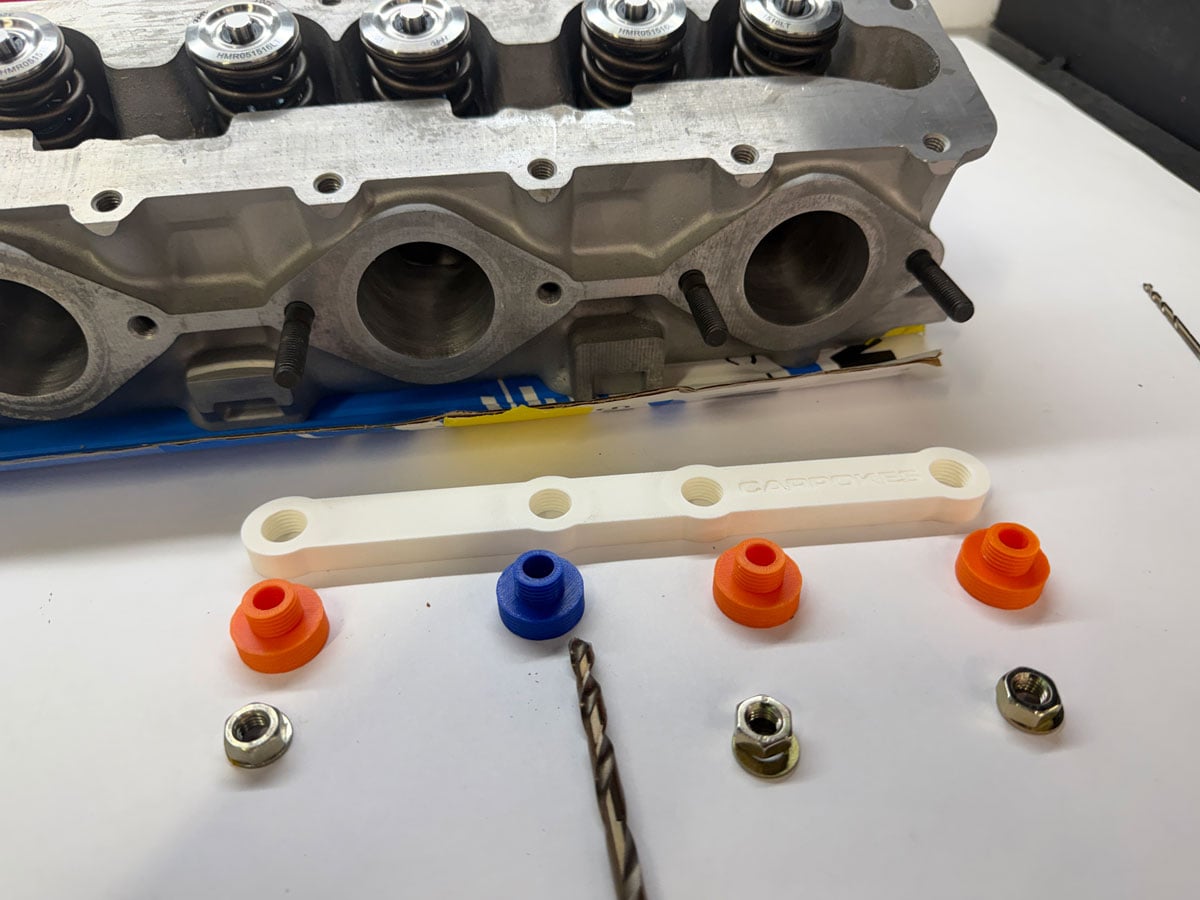
The jig consists of the white alignment piece shown in the picture below, along with various screw-in bushings. It is designed so that, no matter which stud is broken, you can screw in three mounting bushings, shown in orange below, and one appropriately sized drill-bit bushing.
All of the holes are tight by design to keep the drilled hole exactly where it needs to be. You may need to twist your drill bit through the bushing by hand to make sure it spins freely before drilling. I have included 1/8" and 1/4" pilot-hole drill bushings, along with a 21/64" bushing for use with the M8 Helicoil drill bit.
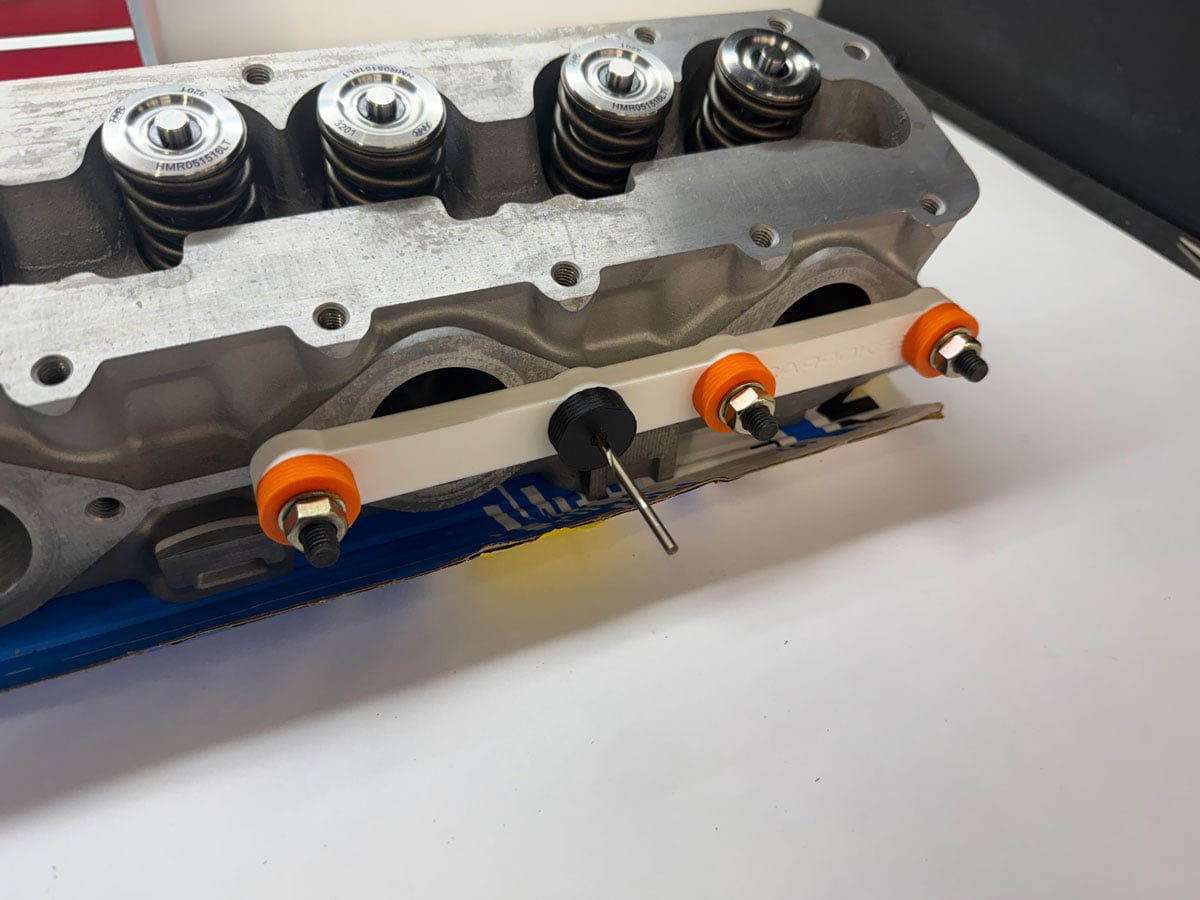
It is a good idea to use a stop collar or a piece of electrical tape on your drill bit as a depth guide. Do not drill too deep.
Be sure to secure the jig with three exhaust washers and nuts so it is firmly mounted over the hole to be drilled. The bushing threads are M14 x 1.5 to accommodate some metal drill-bushing kits that come in that size, such as these.
I printed these in ABS, though PLA should also be fine, using a 0.12 mm layer height and no supports. The thin layer height helps ensure the threads print cleanly and screw together smoothly.
Printer dimensional accuracy is critical. If the jig does not slide over the studs without binding, the print is not dimensionally accurate. You can read up on that here.