Help Needed with DIY Alignment

Naturally aspirated tech and talk
User avatar
usury
Posts: 215
Joined: Thu Sep 15, 2022 1:18 pm
Location: Seattle, WA
Has thanked: 100 times
Been thanked: 93 times
I recently returned to Stock Control Arms on my street-only 1987 944, and I'd like to do a good quality DIY alignment. More importantly, I'd like to develop the skill to do this myself, at least on my own car. I need some guidance.

I understand the basics - camber, caster, toe - and how to adjust them.

Questions first, details follow:

For the DIY people who have done alignments in their garages and driveways, or the pros willing to fill in the blind spot regarding the differences between Caster Method 1 vs Caster Method 2...
- What's the actual correct method?
- Can you explain the multiplier constant in "Caster Method 2"?
- In lieu of explanations, links to other quality resources would be nice :)

Thank you in advance.


With the car level, steering rack locked in the center with the M10 x 1.0mm ("very fine" thread) cone-tipped locking bolt, and the digital protractor zeroed, I dialed in 1.6 degrees negative camber. The little arrows along the side of the protractor screen indicate which way the tool is tipped. I was aiming for negative 1.5 degrees, but by the time I tightened the adjustment bolts, it moved a bit. I got both sides to match.
Camber at 1.6 degrees
PXL_20221110_214742874.jpg (145.86 KiB) Viewed 2111 times


However, measuring caster has presented me with unclear guides. Some of the seemingly knowledgeable YouTube videos about DIY alignment use this procedure, which I'll call "Caster Method 1" (like this quite excellent and thorough YouTube video)

edit: For accurate caster measurement, it is VITAL that your turn out/in angle is measured accurately and precisely.
Neither eyeballing it nor simply letting the wheel bounce back from full lock will be accurate enough.


Caster Method 1
edit: DELIBERATELY GRAYED OUT
  • Turn wheel out 20 degrees (which is basically where it lands after bouncing back from full lock with the car not running)
  • Level and Zero the gauge
  • Turn the wheel in 20 degrees (again, bounce back after full lock)
  • Level the gauge and Read the caster measurement


Caster Method 1
edit: Do this only if your tool has a separate caster indicator/mode/scale
  • Turn wheel out exactly 20° (or whatever your tool specifies)
  • Level and ZERO the caster gauge
  • Turn wheel in exactly 20° (or whatever your tool specifies)
  • Level and Read the caster gauge
  • That is your caster measurement


Caster Method 1a
edit: Do this if your tool has only a camber or degree indicator
  • Turn wheel out exactly 20°
  • Level and ZERO the protractor or camber gauge
  • Turn wheel in exactly 20°
  • Level and Read the protractor or camber gauge
  • Multiply that value by the constant 1.43
  • That is your caster measurement


Other videos and guides use what I'll call "Caster Method 2"

Caster Method 2
  • Turn wheel out 20 degrees (same as above)
  • Level and Read the protractor or camber gauge
  • Turn the wheel in 20 degrees (same as above)
  • Level and Read the protractor or camber gauge
  • edit: DELIBERATELY GRAYED OUT
    Then, depending on the video, do one of the following (the numbers immediately below are meaningless values I pulled from the air for example only):
    • Add out measurement to in measurement
      - looks like people use absolute values of the two measurements?
      - ie, |+1.1| + |-2.2| == 1.1 + 2.2 == 3.3
    • OR Subtract the lower number from the higher number
      - negative numbers are always lower than positive numbers
      - subtracting negative X is the same as adding positive X
      - ie, +1.1 minus -2.2 == 1.1 + 2.2 == 3.3
      - same as adding absolute values, just explained in a different mathematical way.
      - assumes one value will be positive and one negative?
  • Sometimes multiply that value by some (never explained and not consistent) constant (1.43, 1.5, 1.91, 2)

  • edit:
    The numbers here are meaningless values I pulled from the air for example only
    Subtract the lower camber value from the higher camber value
    - negative numbers are always lower than positive numbers
    - subtracting negative X is the same as adding positive X
    - ie, +1.1 minus -2.2 == 1.1 + 2.2 == 3.3
    - ie, +2.2 minus -1.1 == 2.2 + 1.1 == 3.3
    - ie, -1.1 minus -2.2 == 1.1
    - ie, +2.2 minus +1.1 == 1.1
  • Multiply that value by the constant 1.43
  • This produces the EXACT SAME RESULT as Caster Method 1a
  • That is your caster measurement
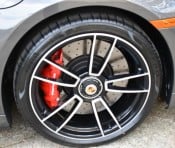
Caster at 2.6 degrees
20221111_201830-COLLAGE.jpg (171.56 KiB) Viewed 2111 times

I was able to easily set 2.6 degrees caster using Caster Method 1. Well, I thought.

The tool I'm using is NOT the same bubble-level tool with separate caster indicator as the guy is using in the YT video, so I'm not actually using Caster Method 1. edit: Furthermore, I had not leveled the tool prior to taking my readings. And I did not multiply by 1.43 (see the next reply to this post for what that's about).

So I got concerned I was doing it wrong, watched more videos, and saw "Caster Method 2" and the various unexplained multiplier constants. The comment sections in some of those videos have people asking about the constants, too, but no explanation was offered. I suspect it has something to do with trigonometry.

The comment section in the knowledgeable YT video (with the magnetic tool that included a separate caster indicator) referenced another (less well shot/edited and very brief) YT video that uses a square magnetic protractor similar to what I have.

Again in the comment section of knowledgeable video, the video creator made a point to say the actual caster value isn't as important as maximizing that value and making it the same on both sides.

Perhaps both "Caster Method" roads proverbially lead to Rome?

Perhaps tools that include a separate caster indicator use a scale that automatically factors in the necessary trig multiplier?

I'm good at math and have a computer science degree, but it has been 2+ decades since my last proper math class at this point. Still, I feel like I can grasp this if given enough accurate information.

Notes:
  • The car is parked on level ground front to back and side to side, at least after shimming the right front wheel by 3/4", confirmed with a large framing level.
  • I'm using low-tech cardboard-on-cardboard for a slip surface to help the suspension settle more easily.
  • It is drive-able right now and feels really good at low speeds and freeway speeds. No pulling under braking. No wandering or vagueness. It's better than it has been in years.
  • I could take it to a shop, but I want to develop the skill to do this myself.
Last edited by usury on Mon Nov 14, 2022 7:32 pm, edited 4 times in total.

#1

User avatar
usury
Posts: 215
Joined: Thu Sep 15, 2022 1:18 pm
Location: Seattle, WA
Has thanked: 100 times
Been thanked: 93 times
These are things I think I've learned in the past few days doing a deep dive into DIY wheel alignment. May this info be useful to others in the future, at least as a jumping off point for their own investigation/confirmation/experimentation.

Please feel free to correct me, and please feel free to add what you know, too.

Variables
Cs = Caster (in degrees)
Ca = Camber (in degrees)
𝚫Ca = Change in Camber measurement between turned in/out
SA = Swept Angle
  • If you are measuring by turning out/in by 15°, your Swept Angle is 30°
  • If you are measuring by turning out/in by 20°, your Swept Angle is 40°

Math
Cs = ( 180 × 𝚫Ca ) ÷ ( 𝛑 × SA )

I don't understand how to derive that formula, but I do know how to refactor it and reduce it for common Swept Angles

15° turn in/out= 30° SA:
  • Cs = ( 180 × 𝚫Ca ) ÷ ( 𝛑 × 30 )
  • Cs = 𝚫Ca × ( 180 ÷ ( 𝛑 × 30 ) )
  • Cs = 𝚫Ca × 1.909859317
  • This is often rounded to
    Cs = 𝚫Ca × 2
20° turn in/out= 40° SA:
  • Cs = ( 180 × 𝚫Ca ) ÷ ( 𝛑 × 40 )
  • Cs = 𝚫Ca × ( 180 ÷ ( 𝛑 × 40 ) )
  • Cs = 𝚫Ca × 1.432394488
  • This is often rounded to
    Cs = 𝚫Ca × 1.5


Tools having Camber and Caster Indicators
In addition to having a camber indicator, some bubble gauge (and digital gauge) tools include a separate indicator (or mode button ) for caster. Those caster indicators/modes automatically factor in the math for the tool's intended Swept Angle.

This FasTrax camber/caster system (immediately below) uses a single indicator. However, that indicator has two scales - one for camber and one for caster. This tool expects 15° turn in/out, for a 30° Swept Angle. The angles on the nose of the tool are intended to help you eyeball 15° turn in/out.

Notice that the camber scale has a total range of 8°, and the caster scale has a total range of 16°. The multiplier of approximately 2.0 (due to its intended 30° Swept Angle) is built into the scale on this tool.
FasTrax Tool - 15 degree
FasTrax Camber&Caster Gauge.jpg (90.72 KiB) Viewed 2045 times
FasTrax Gauge Zoomed In
FasTrax Camber&Caster Gauge-zoom.jpg (82.17 KiB) Viewed 2045 times

This purple tool, immediately below, has separate indicators for negative and positive camber (on the sides) as well as a caster indicator in the center. I believe this particular tool expects 20° turn in/out, for a 40° Swept Angle. The angles on the nose of the tool are intended to help you eyeball 20° turn in/out. It also has a small standard bubble level (circled in yellow) to help you plumb the tool prior to reading measurements.

Notice that the scale on the caster (center) indicator is different than the scale on the camber (side) indicators.
Purple Tool - 20 degree
Purple Camber&Caster Tool-sm.jpg (128.37 KiB) Viewed 2045 times

You can find either of the above tools, and many more, by searching for "Camber Caster Tool" on Amazon.


Using Tools without a Caster Indicator or Scale
Using the formulas above (in the Math section), as long as you can measure camber at your desired turn in/out angles, you can compute caster.

If you use relatively standard 15° or 20° turn in/out angle (with corresponding 30° or 40° Swept Angle), you can use the pre-computed constants from those formulas. I'll leave it as an exercise to compute your own constant for a 28° turn in/out (56° sweep). Or 19° (38° sweep).
Last edited by usury on Tue Nov 15, 2022 8:00 am, edited 2 times in total.
Freelance New Age Renaissance Man
and Wrench Warrior
1987 944na with S2/Turbo facelift
Seattle, Washington, USA

#2

User avatar
Tom
Site Admin
Posts: 8955
Joined: Fri Jun 25, 2021 2:04 pm
Location: Silicon Valley, CA
Has thanked: 936 times
Been thanked: 4020 times
Contact:
You are a wrench warrior for sure. Awesome info. Alignments have been one of the very few things I let shops do on my car, along with mounting/balancing tires, 'most' body work, and maybe something I'm forgetting. Your posts make me want to give it a try though. Let us know how it does when you have a chance to test it, and how the tires wear over time. I've seen track guys do it with strings and such, but always got the impression that was quick and dirty for track use only....

#3

User avatar
usury
Posts: 215
Joined: Thu Sep 15, 2022 1:18 pm
Location: Seattle, WA
Has thanked: 100 times
Been thanked: 93 times
Tom wrote: Mon Nov 14, 2022 1:31 pm You are a wrench warrior for sure. Awesome info. Alignments have been one of the very few things I let shops do on my car, along with mounting/balancing tires, 'most' body work, and maybe something I'm forgetting. Your posts make me want to give it a try though. Let us know how it does when you have a chance to test it, and how the tires wear over time. I've seen track guys do it with strings and such, but always got the impression that was quick and dirty for track use only....
Thank you! I'll definitely post some updates in the future. Yesterday I drove the car further than I have in ages (I'm the guy who had chronic low oil pressure until I replaced the seal on the oil pick-up tube. Then I fixed about a zillion other things, reverted to factory control arms, etc). It handled awesome! No wandering (on good pavement at least). No pulling under hard braking. Stable as a train at freeway speeds. Responsive and sure-footed in twisties. Fun.

I also have an additional resource. This is where the formula from the Math section came from.

Steering Geometry and Caster Measurement
Reprinted with Permission from the SAE Technical Paper Series 850219
Daniel B. January
Hunter Engineering Company
Bridgeton, Missouri

White Paper on Suspension Geometry.
Freelance New Age Renaissance Man
and Wrench Warrior
1987 944na with S2/Turbo facelift
Seattle, Washington, USA

#4

User avatar
usury
Posts: 215
Joined: Thu Sep 15, 2022 1:18 pm
Location: Seattle, WA
Has thanked: 100 times
Been thanked: 93 times
I do have more images and thoughts to contribute regarding my DIY alignment methodology, which may take me a day or two to post. However, I'm most concerned about how I "eyeballed" my 20° turn in/out. Turns out, an error of just 1° in that measurement produces a sizable error in the actual caster value.

If I'm aiming for +3.0° caster and I'm off by just 1° in turn in/out, my caster might be off by approx 0.3° (if I'm reading the error graph properly from the White Paper I referenced further above).
Caster Error
Caster Error
Caster Error.png (50.58 KiB) Viewed 1838 times

I suppose if I made exactly the same error in turn in/out angle measurement on both sides of the car, then the resulting caster on both sides of the car would be the same. It's hard enough to deliberately make accurate measurements. It's probably even harder to accidentally make consistent inaccurate measurements.
So I'm not counting on that.

I think before I call it completely done, I'm going to want to much more precisely measure my turn in/out angles and re-take my measurements.

edits: Clarity, better photo
Last edited by usury on Fri Nov 18, 2022 7:50 am, edited 1 time in total.
Freelance New Age Renaissance Man
and Wrench Warrior
1987 944na with S2/Turbo facelift
Seattle, Washington, USA

#5

User avatar
usury
Posts: 215
Joined: Thu Sep 15, 2022 1:18 pm
Location: Seattle, WA
Has thanked: 100 times
Been thanked: 93 times
I still want to confirm my measurements (documented in photos below) prior to saying I'm truly finished. Then I will write a less edited and more complete how-to. Until then, let these photos be informative for the next person learning to do DIY alignments.


Measurement Tool
I already owned this digital angle gauge (aka digital protractor, aka digital angle finder). It is commonly used in woodworking tasks to precisely set table saw blade angle (relative to table saw surface). This particular model has built in lasers to project a level horizontal laser line against a wall, as well.
The Tool
The Tool
20221116_111134-COLLAGE.jpg (188.7 KiB) Viewed 1976 times

It operates in two modes:
  • Level mode: uses factory-calibrated 0°
    Sit it on a regular carpenters level with a centered bubble indicator, and this tool will also read 0°, meaning it works like a level. Or rather it uses the same reference plane a level uses. Thus the name of the mode.
  • Relative mode: allows you define any arbitrary starting angle as 0°
    If your job-site table saw is sitting on slightly uneven surface, for instance, you zero the gauge on the table saw surface, stick the gauge to the saw blade (the tool has internal magnets on all four sides), and adjust the blade to the exact angle you want.

Reading the Tool
When Level appears on the screen, the tool is operating in Level mode. If "Level" does not appear on the screen, you have pressed the button to put it in Relative mode, thus selecting your own 0° reference plane. That distinction is important when interpreting the photos appearing below.

The screen does not indicate positive/negative with + or - signs. Rather, it has little arrows along the side of the screen that indicate which way the tool is rotated. It is up to you to assign positive vs negative based on those little arrows and which side of the tool is touching the thing you are measuring (and the requirements/conventions of whatever work you are doing).

In all of the following photos, I've consistently placed the left side of the tool (as determined when viewing the screen in correct-side-up orientation) against the wheel being measured. That means, when in "Level" mode, counter clockwise rotation of the tool directly corresponds to negative camber. Had I placed the right side of the tool against the wheel (again screen correct-side-up), counter clockwise rotation of the tool would have meant positive camber.

My point, you really need to understand how to read the tool in order to take a proper measurement. This tool isn't difficult. A person just needs to be careful and consistent.
Reading the Tool
Reading the Tool
20221116_095023-COLLAGE.jpg (225.13 KiB) Viewed 1976 times

Attaching Tool to Car
Ideally there would be a flat surface large enough to magnetically attach the tool to the car. However, my "sewer lid" rims do not allow access to the brake rotor (an ideal surface). Furthermore, the axle nut cap is also rounded. Using some high strength magnets and a strip of scrap 18G steel, I made a flat surface that references the flat portion of the lip that retains the center caps.
Attaching the Tool
Attaching the Tool
20221113_165754-COLLAGE.jpg (350.38 KiB) Viewed 1976 times
When I do this again, I want a more precisely fitting piece of scrap steel that is just a little bit wider, too. It would make plumbing this particular tool to vertical a little easier.

To facilitate plumbing the tool (making it vertical to the ground prior to taking measurements), I mounted a spare bubble level (from something I must have disassembled) to a strong magnet using epoxy. Then I could attach that bubble level to the outside face of the tool.
Making the Tool Plumb
20221116_092015-COLLAGE.jpg (115.58 KiB) Viewed 1976 times


Right Side of Car
These were my readings when setting caster on the Right Side. The top two photos show "Level" on the screen, indicating these values are relative to true horizontal/vertical. The bottom two photos do not show "Level" on the screen, indicating Relative mode. For those measurements, I zeroed the gauge when the wheel was turned out.

You can see the difference between +1.05 and -1.05 (top row) is +2.10. This is reflected in the relative measurement appearing in the bottom row (+2.15, I'm guessing the tool isn't truly accurate to 5/100th of a degree, so this is pretty close to +2.10).

Since I was turning out/in by 20°, my total swept angle between those two points is 40°. I need to use 1.43 as my multiplier and the measured change in camber to determine caster.
Right Side
Right Side
20221113_180431-COLLAGE.jpg (337.72 KiB) Viewed 1953 times


Left Side of Car
Just like the Right Side. The top row of photos show "Level" on the screen. The bottom row does not.

You can see the difference between +2.35 and +0.20 (top row) is +2.15. This is reflected in the relative measurement appearing in the bottom row.

Since I was turning out/in by 20°, my total swept angle between those two points is 40°. I need to use 1.43 as my multiplier and the measured change in camber to determine caster.
Left Side
Left Side
20221113_180242-COLLAGE.jpg (400.56 KiB) Viewed 1953 times

Notes
You set caster prior to setting camber. That likely explains the difference in turned in/out camber measurements between the left and right sides. A precise value for camber hasn't been dialed in yet. Regardless, you simply need the change in camber between turned in/out when computing caster.

I suspect if you adjust your camber by a large enough amount (no idea what that might be), it will affect your caster as well. A person could chase back and forth between adjusting camber and caster multiple times, I'm sure, until you reach the point of "awww close enough".


What About Toe
Toe is damn simple compared to all these fussy angle measurements. After setting caster and camber, I needed a perfect rectangle around the car.

I used two scrap strips of plywood cut to exactly the same length. With those two strips of plywood clamped together, I cut a series of notches 1-inch apart at each end.

I sat them on jack stands at the front/rear of the car and connected corresponding notches with kite string. I may have gotten lucky and already made a rectangle. Or perhaps a parallelogram. Or maybe some kind of trapezoid. But I need a rectangle and I need to be certain.

If I'm 5 notches in from each end of each strip, I know my strings are probably pretty close to parallel. However, the strings are parallel only if my strips of plywood are actually parallel to each other.

I adjusted each of the rear jack stands until the notched strip of plywood was an equal distance to some fixed reference point on the car. I used the center of each rear wheel. I did the same for the front using the center of each front wheel. (I suppose you could use the the rear/front of the door panel, or some point on the wheel arch.)

Then I confirmed that the two strips of plywood are an equal distance to each other on each side of the car. Since the plywood strips are the same length (using corresponding notches for the string), and the strings are now the same length (since the strips of plywood are the same distance apart), at least I have a parallelogram.

Then, I slid the rear plywood strip side-to-side across the top of the jack stands until the string was an equal distance from the center of each rear wheel. I did the same for the front. I used a tape measure with 1/16" precision for all my measurements, meaning i could eyeball ~1/32" as the half-way point between 1/16" markings. Now I have a rectangle.

Once my box was truly a rectangle, I could measure the distance between the string and the front/rear of each rim.
Stringing for Toe
Stringing for Toe
PSX_20221113_165644.jpg (329.48 KiB) Viewed 1976 times
Freelance New Age Renaissance Man
and Wrench Warrior
1987 944na with S2/Turbo facelift
Seattle, Washington, USA

#6

User avatar
911R
Posts: 484
Joined: Thu May 19, 2022 8:22 am
Location: North Georgia
Has thanked: 158 times
Been thanked: 147 times
Nice post. I think you explained it all in your post. This is great tech. No Doubt. Most modern Porsche cars are good unless you change suspension parts or see visible unusual tire wear.

It can also be done with strings and a long straight rod. A guy always starts with a completely flat floor (I borrowed a laser to get it correct).

I raced cars in vintage for 25 years. Here is my Championship '65 Mustang next to the trailer.
Image

I'd say camber is the most important thing. A guy needs more negative camber in shorter tracks and less negative camber in longer tracks. I want the entire tire patch to grip as the front tires rotate into a corner. You can see it here:
Image

I like negative toe (the front wheels each are in -1/4"). It keeps the car from wandering around at 100 Mph+. Some guys like positive toe (positive +1/4") as they think it helps them entering the corner apex with better velocity. Both work well as the driver feels it in his butt in the seat.

I say the factory specs are suggestions for good tire wear. I'd add that a little more negative camber for more grip in the corners. JMO, of course.
2019 Ford GT350
2023 Porche 911 Turbo

#7

User avatar
usury
Posts: 215
Joined: Thu Sep 15, 2022 1:18 pm
Location: Seattle, WA
Has thanked: 100 times
Been thanked: 93 times
911R wrote: Thu Nov 17, 2022 2:37 pm Nice post. I think you explained it all in your post.
Thank you very much. It is truly affirming to have confirmation that I'm getting my head around the problem correctly.

The Porsche service manual does seem quite conservative in it's specified camber setting for my year of 944 (-0.5 degrees if I remember correctly).

I'm glad you mentioned the importance of more negative camber. It looks like I could get about -2 degrees camber with the factory adjuster.

I ended up dialing in -1.5 degrees camber on the left side and -1.8 on the right. I figure the slight bit extra negative camber on the right helps with straight line tracking on crowned roadways. Mine is a street car.

Those are fantastic shots of your mustang!
Freelance New Age Renaissance Man
and Wrench Warrior
1987 944na with S2/Turbo facelift
Seattle, Washington, USA

#8

dr bob
Moderator
Posts: 627
Joined: Thu Jul 08, 2021 9:30 pm
Location: Central Oregon
Has thanked: 252 times
Been thanked: 247 times
I went through some similar gymnastics after some mediocre-or-worse results from a highly-regarded Los Angeles-area alignment place. I sat under the car with the alignment tech, walked through the whole process, verified the settings on his Hunter machine as we did them, cycled back through all the settings to be sure. Then chewed through a set of PS2's in well under 1000 miles. Took it back to them and it went back on the same machine to see what had moved. Nothing. Settings still perfect per their machine. Lesson: Find a place that regularly maintains their equipment, and doesn't drop their wheel fixtures. Swapping those wheel fixtures left-to-right identified the measurement disparity for them. Ahem...


I ended up building some wheel fixtures for laser levels, using 2" aluminum box tubing and some 1" aluminum angle stock to allow the fixtures to set on the wheel lips. Better in my opinion than trying to pilot a tool on the center-cap hole. Plu a great foundation for almost anything I wanted to try. After that it was "just" some trig and some spacers (drill bits) to get camber set correctly.

Get the fixture vertical (on wheel rotation) using a second bubble level, the silver one in the pics:
DSC03500.JPG
DSC03500.JPG (1.46 MiB) Viewed 1831 times

Rotate that bubble level to lateral, and adjust camber to get the level perfectly vertical with the correct drill bit as spacer at the top. I made a table of drill bit sizes for different diameter wheels, with calcs for the 928-spec -30' +/-10". That's one half of one degree, way lighter than what you are looking for I suspect. This is pretty easy trig on your smart phone calculator, and drill bits are pretty accurate spacers. Reminder: Set calcs for degrees vs. radians.

My measurement setup:
DSC03509.JPG
DSC03509.JPG (1.49 MiB) Viewed 1831 times

Of course your digital angle gauge could easily shortcut the level-and-drill-bits method. Just use a spring clamp to hold it to the tube frame for measurements. Plus you'd want the angle gauge on there for calc'd caster measurements anyway. More:

Caster was the slightly bigger challenge, and I ended up with digital angle gauges. Mine only read to tenths of a degree, and I probably need to up my game to the ones you show, with readings to hundredths of a degree. The laser levels I used have a "beam splitter" that generates a line from the single beam, and I use that with a "grid paper" with target turn angles taped to the floor. That gets the turn angles on the steering just right to get the differential measurements needed.

I read the SAE white paper you referenced as I started the project, and started to simplify the calculations some with 928 settings as a target. This was for part of a whole instruction for DIY 928 alignment I wrote, including how to build the fixtures and set up the lasers. Since you are comfortable with your camber and likely your toe settings, I won't bore you with all that stuff. But the caster... I stumbled onto a DIY alignment fixture made by SmartRacing Products in Campbell, Ca. They are within spitting distance of Tom, but that's not important. The goldmine for getting caster correct is in the instructions for their SmartCamber tool. The most current version is available online at: https://static1.squarespace.com/static/ ... t+4.22.pdf
Spend some time looking at their caster method. Their tool uses an aluminum fixture to hold their digital angle gauge. With that I was off to the races, literally. As you will be!

Even more:
My "slip plates" are thin PE "cutting board sheets" from WalMart, two in a sandwich under each tire. Spray some Pam cooking spray into the sandwich for lubrication. If you follow the SmartCamber instruction with vinyl floor tiles as levelling shims, some Pam between those tiles will do the same trick.

Be Sure to account for the slope of your floor, including any shims, in your caster calcs.

I was living above Los Angeles at the time I started the effort. There's a DIYer's paradise called Industrial Metal Supply in Sunland just off the 5 freeway that sells already cut pieces of metal materials by the pound at essentially scrap value. I make it a point to visit that warehouse/store when I'm visiting there with a car. A couple lengths of that 2" .250-wall box tubing have since ridden home to Oregon on a 928 ski rack.
dr bob

1989 928 S4, black with cashmere/black inside
SoCal 928 Group Cofounder
928 Owner's Club Charter Member
Former Ex Bend Yacht Club Commodore Emeritus

Free Advice and Commentary. Use At Your Own Risk!

#9

User avatar
danmartinic
Posts: 291
Joined: Thu Jul 01, 2021 2:11 pm
Has thanked: 23 times
Been thanked: 41 times
usury wrote: Wed Nov 16, 2022 12:16 pm
What About Toe
Toe is damn simple compared to all these fussy angle measurements. After setting caster and camber, I needed a perfect rectangle around the car.

I used two scrap strips of plywood cut to exactly the same length. With those two strips of plywood clamped together, I cut a series of notches 1-inch apart at each end.

I sat them on jack stands at the front/rear of the car and connected corresponding notches with kite string. I may have gotten lucky and already made a rectangle. Or perhaps a parallelogram. Or maybe some kind of trapezoid. But I need a rectangle and I need to be certain.

If I'm 5 notches in from each end of each strip, I know my strings are probably pretty close to parallel. However, the strings are parallel only if my strips of plywood are actually parallel to each other.

I adjusted each of the rear jack stands until the notched strip of plywood was an equal distance to some fixed reference point on the car. I used the center of each rear wheel. I did the same for the front using the center of each front wheel. (I suppose you could use the the rear/front of the door panel, or some point on the wheel arch.)

Then I confirmed that the two strips of plywood are an equal distance to each other on each side of the car. Since the plywood strips are the same length (using corresponding notches for the string), and the strings are now the same length (since the strips of plywood are the same distance apart), at least I have a parallelogram.

Then, I slid the rear plywood strip side-to-side across the top of the jack stands until the string was an equal distance from the center of each rear wheel. I did the same for the front. I used a tape measure with 1/16" precision for all my measurements, meaning i could eyeball ~1/32" as the half-way point between 1/16" markings. Now I have a rectangle.

Once my box was truly a rectangle, I could measure the distance between the string and the front/rear of each rim.
PSX_20221113_165644.jpg
Don't we have different track width front & rear? Plus, the wheel offsets are different. Would making the string equal distance from all four wheels fail to take this into account?

#10

Post Reply