944S in Canada - long in the tooth project

Tech and talk about all 16 valve 944 and 968 Cars
500
Posts: 52
Joined: Tue Jan 30, 2024 2:40 pm
Has thanked: 4 times
Been thanked: 34 times
I was able to continue to powder coat small pieces on my own, like the hub flanges in the previous post as well the turbo front spindles.
P1010363.JPG
P1010363.JPG (779.52 KiB) Viewed 2425 times
For the front lower control arms, new OEM rubber front bushings were installed, and I purchased a set of 968 camber blocks for the rear of the arms.

The ball joints seemed fine, but I decided to proactively replace them using the Rennbay “race” kit.
P1010309.JPG
P1010309.JPG (603.32 KiB) Viewed 2425 times
P1010315.JPG
P1010315.JPG (512.11 KiB) Viewed 2425 times
P1010316.JPG
P1010316.JPG (522.32 KiB) Viewed 2425 times
Originally I rebuilt the power steering rack:
P1000414.JPG
P1000414.JPG (551.87 KiB) Viewed 2425 times
But then… I found that new complete OEM manual steering kits were available (they no longer are, it seems) and I decided I would prefer that, so I purchased that and sold my rebuilt rack and pump.
P1000775.JPG
P1000775.JPG (616.28 KiB) Viewed 2425 times
All the pieces to get the front end back to roller status were not on hand and it was a pretty easy job to get everything installed.
I now had a roller that could be steered and functional parking brakes, which was the minimum needed to get the car out of the garage and onto a flatbed for transport to the new house when we moved.
P1010654.JPG
P1010654.JPG (585.64 KiB) Viewed 2425 times
P1010667.JPG
P1010667.JPG (618.95 KiB) Viewed 2425 times
P1010671.JPG
P1010671.JPG (602.15 KiB) Viewed 2425 times
P1010698.JPG
P1010698.JPG (553.34 KiB) Viewed 2425 times
Last edited by 500 on Mon Mar 04, 2024 12:11 pm, edited 2 times in total.

#21

500
Posts: 52
Joined: Tue Jan 30, 2024 2:40 pm
Has thanked: 4 times
Been thanked: 34 times
In between progress was made on body assembly.

Door, hatch, front window and sunroof seals were replaced with new OEM.

For the door handles, I ended up going with new 968 handles, painted to match.
Taillight lenses were polished and reinstalled, along with the rear side markers.
P1010321.JPG
P1010321.JPG (512.06 KiB) Viewed 2426 times
P1010357.JPG
P1010357.JPG (556.51 KiB) Viewed 2426 times
P1010358.JPG
P1010358.JPG (593.91 KiB) Viewed 2426 times
P1010542.JPG
P1010542.JPG (579.37 KiB) Viewed 2426 times
P1010562.JPG
P1010562.JPG (610.43 KiB) Viewed 2426 times
P1010591.JPG
P1010591.JPG (592.62 KiB) Viewed 2426 times
Last edited by 500 on Mon Mar 04, 2024 12:04 pm, edited 1 time in total.

#22

500
Posts: 52
Joined: Tue Jan 30, 2024 2:40 pm
Has thanked: 4 times
Been thanked: 34 times
In the fall of 2007 came the moving day.

I put a set of 996 Sport Design wheels on the car and rolled it out into the daylight. It was looking pretty good.
P1010758.JPG
P1010758.JPG (236.78 KiB) Viewed 2427 times
P1010760.JPG
P1010760.JPG (387.98 KiB) Viewed 2427 times
P1010766.JPG
P1010766.JPG (403.26 KiB) Viewed 2427 times
P1010770.JPG
P1010770.JPG (630.18 KiB) Viewed 2427 times
The flatbed driver was a real enthusiast and really took his time.
P1010773.JPG
P1010773.JPG (611.94 KiB) Viewed 2427 times
At the new home, I had anchored in a bracket into the rear concrete knee wall and was able to use a Turfor to winch the car into the garage.
P1010777.JPG
P1010777.JPG (606.38 KiB) Viewed 2427 times
P1010778.JPG
P1010778.JPG (418.37 KiB) Viewed 2427 times
Last edited by 500 on Mon Mar 04, 2024 12:01 pm, edited 1 time in total.

#23

500
Posts: 52
Joined: Tue Jan 30, 2024 2:40 pm
Has thanked: 4 times
Been thanked: 34 times
With the car in the new place, work progressed. The rear calipers and Koni shocks were mounted.
P1010822.JPG
P1010822.JPG (615.65 KiB) Viewed 2428 times
P1010823.JPG
P1010823.JPG (597.46 KiB) Viewed 2428 times
P1020031.JPG
P1020031.JPG (386.97 KiB) Viewed 2428 times
P1020034.JPG
P1020034.JPG (555.31 KiB) Viewed 2428 times
And the quarter windows went back in with new seals.
P1020306.JPG
P1020306.JPG (719.64 KiB) Viewed 2428 times
P1020307.JPG
P1020307.JPG (669.02 KiB) Viewed 2428 times
It was at this point (2008) that the first engine build started.
Last edited by 500 on Mon Mar 04, 2024 11:58 am, edited 1 time in total.

#24

500
Posts: 52
Joined: Tue Jan 30, 2024 2:40 pm
Has thanked: 4 times
Been thanked: 34 times
So in a nutshell, I got the 911 around that time, found some issues in it and (as per normal for me) ended up doing a full rebuild of the engine, chassis and transmission, with some body repair for fun.

This effectively mothballed the 944 project until early 2015, at which point I started disassembling the motor in preparation for the re-bore.

As I started to get near the end of the motor build up, my attention turned back to the chassis. During the intervening time since my first TT rebuild, I became aware of the Black Sea R&D “superbearings” and I was instantly in love, and had to have them!

Getting the TT back out meant dropping the rear suspension (again), not my favorite task. However, I decided I wanted to change a few decisions I had made the first time around: I wanted to use rubber isolated semi-trailing arm bushings instead of monoballs, and also OE type spring plate bushings.

So, for those keeping track: Two engine rebuilds, two TT rebuilds and two rear suspension rebuilds!

#25

500
Posts: 52
Joined: Tue Jan 30, 2024 2:40 pm
Has thanked: 4 times
Been thanked: 34 times
So as engine build #2 got well along, I dropped the rear suspension and torque tube to prepare for the Superbearings:
IMG_2429.JPG
IMG_2429.JPG (2.09 MiB) Viewed 2430 times
IMG_2432.JPG
IMG_2432.JPG (2.03 MiB) Viewed 2430 times
Once the TT was finished and back in place, the rear subassembly went back in.
IMG_2450.JPG
IMG_2450.JPG (2.05 MiB) Viewed 2430 times
At this point, the spring plate and semi-trailing arm bushings were replaced, and the torsion bars were reindexed.
IMG_0378.jpg
IMG_0378.jpg (2.19 MiB) Viewed 2430 times
IMG_1089.jpg
IMG_1089.jpg (1.79 MiB) Viewed 2430 times
IMG_1093.jpg
IMG_1093.jpg (2.38 MiB) Viewed 2430 times
Last edited by 500 on Mon Mar 04, 2024 10:50 am, edited 1 time in total.

#26

500
Posts: 52
Joined: Tue Jan 30, 2024 2:40 pm
Has thanked: 4 times
Been thanked: 34 times
Thoughts now turned to the transaxle. With everything else so “new”, I wanted to make sure that the gear box was in good condition with fresh synchros at least. After some consideration, I decided to take it to Ernie at Mantis to do a full rebuild for me.

Aside from my questionable ability, it was also not practical for me to heat the gear box housing to specified temperatures for pressing in bearings etc.

As it was, sourcing some of the bearings was a challenge and Ernie had to go to Germany for a couple that were very, VERY expensive. I was coincidentally in Germany on a business trip on a train platform when Ernie called me for the OK to go ahead on these bearings as they were so expensive, or just re-use what was there (which was worn, but still serviceable). At this point I just bit the bullet. Happy now, as the financial pain is forgotten!

When it came time to install the transaxle it was pretty easy as the car was now on a four-post lift and I have a transmission jack. The transmission mount is a new OEM unit.
IMG_2992.jpg
IMG_2992.jpg (2.08 MiB) Viewed 2431 times
I completely renewed the shift linkage and it at least feels very good. Let’s see how it drives when the time comes…
IMG_3583.jpg
IMG_3583.jpg (1.63 MiB) Viewed 2431 times
Before the transaxle went in, the fuel pump and associated plumbing was renewed.

Finally, the drive axles were added.
IMG_3028.jpg
IMG_3028.jpg (2.13 MiB) Viewed 2431 times
IMG_3029.jpg
IMG_3029.jpg (1.54 MiB) Viewed 2431 times
IMG_3031.jpg
IMG_3031.jpg (1.54 MiB) Viewed 2431 times
IMG_3047.jpg
IMG_3047.jpg (2.16 MiB) Viewed 2431 times
At this time, the rear bumper and P O R S C H E decal were added.
IMG_3584.jpg
IMG_3584.jpg (2.21 MiB) Viewed 2431 times
At this point, the unexpected Subaru project happened, so the car was again mothballed until a couple of months ago.

So, I have almost caught up to the present time. I tried to cover the high points but there were a lot of things I glossed over or left out. If anyone has any questions, please ask.

I will be continuing this thread with the current progress (right now, I am planning to put the engine back in April).
Last edited by 500 on Mon Mar 04, 2024 10:44 am, edited 1 time in total.

#27

User avatar
NCGermerican
Posts: 275
Joined: Thu Jan 13, 2022 8:49 am
Location: Raleigh, NC
Has thanked: 141 times
Been thanked: 92 times
Holy moly. ......and I thought I put a lot of time, effort and money into MY cars. I'm extremely jealous and envious of your work! My wife would have definitely divorced me though.
1987 951 - Nautic Blue over Linen
2015 Audi RS5 Sepang Blue (Daily)
2023 Durango R/T AWD - Destroyer Grey (Wife's Daily)
2013 Audi A5 Quattro - Brilliant Black (Son's daily)
1987 944 S - Nautic Blue over Linen - sold August 2024

#28

500
Posts: 52
Joined: Tue Jan 30, 2024 2:40 pm
Has thanked: 4 times
Been thanked: 34 times
I am certainly blessed with a patient wife!

I do try and keep making deposits in the goodwill bank though… repairing cars and doing all manner of “handyman” jobs for her extended family keep me in the “useful to have around” column.

The posts thus far on this thread have been a “high points” synopsis of the car project up to this year. As of January, the Subaru project is almost done. The last few items are waiting on updated front strut bottoms from the manufacturer of the coilovers. Because of that, I have started back on the 944 project in the meantime, although I will still have to squeeze in a bit more work on the Subie during the spring.

The first job was just to get myself back up to speed on the myriad details. Fortunately, I had a pretty decent way of organizing all the parts, so that helped, although I did make a new cataloguing system in January adopting a format that I came up with on the Subaru that is more robust.

The near-term target is to put the engine back in the car in April. So, the push has been to get all the ancillary items around the engine compartment done in preparation for that.

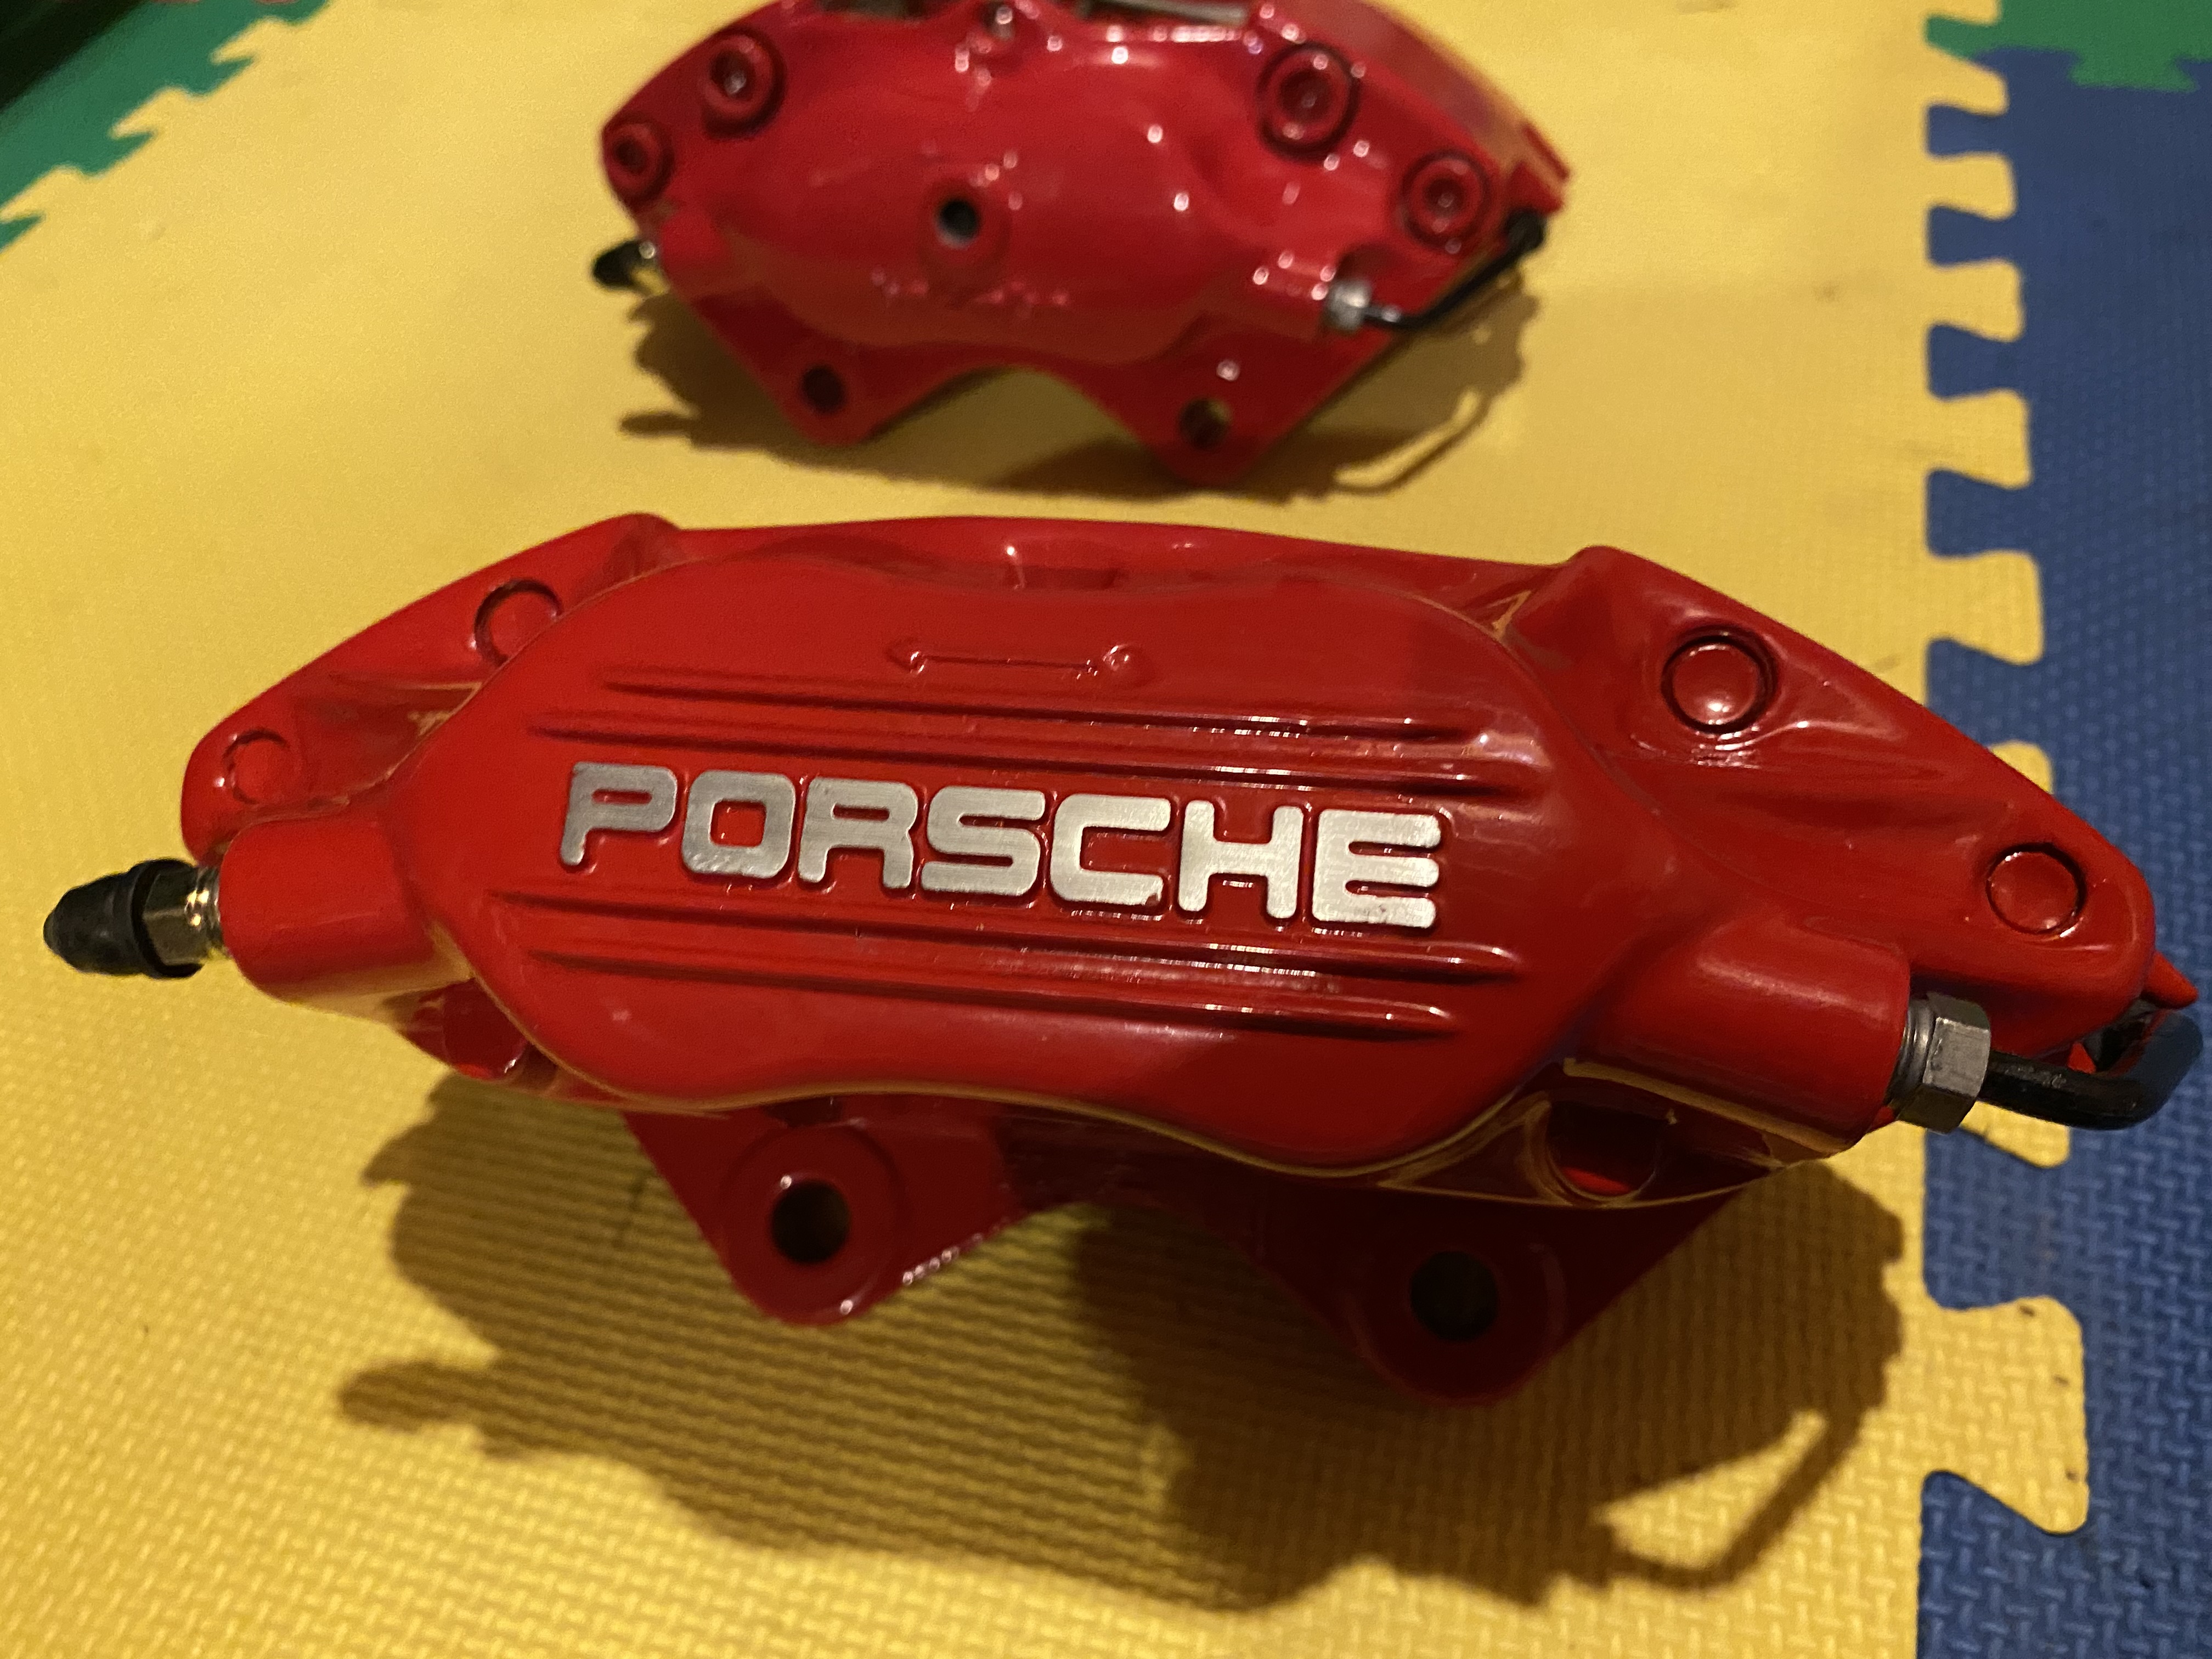
Over January and February, the main items completed included finished the brake caliper rebuild for the fronts (new pistons and seals). The rears were finished some time ago, but I had to get these done.
IMG_9580.JPG
IMG_9580.JPG (3.13 MiB) Viewed 2464 times
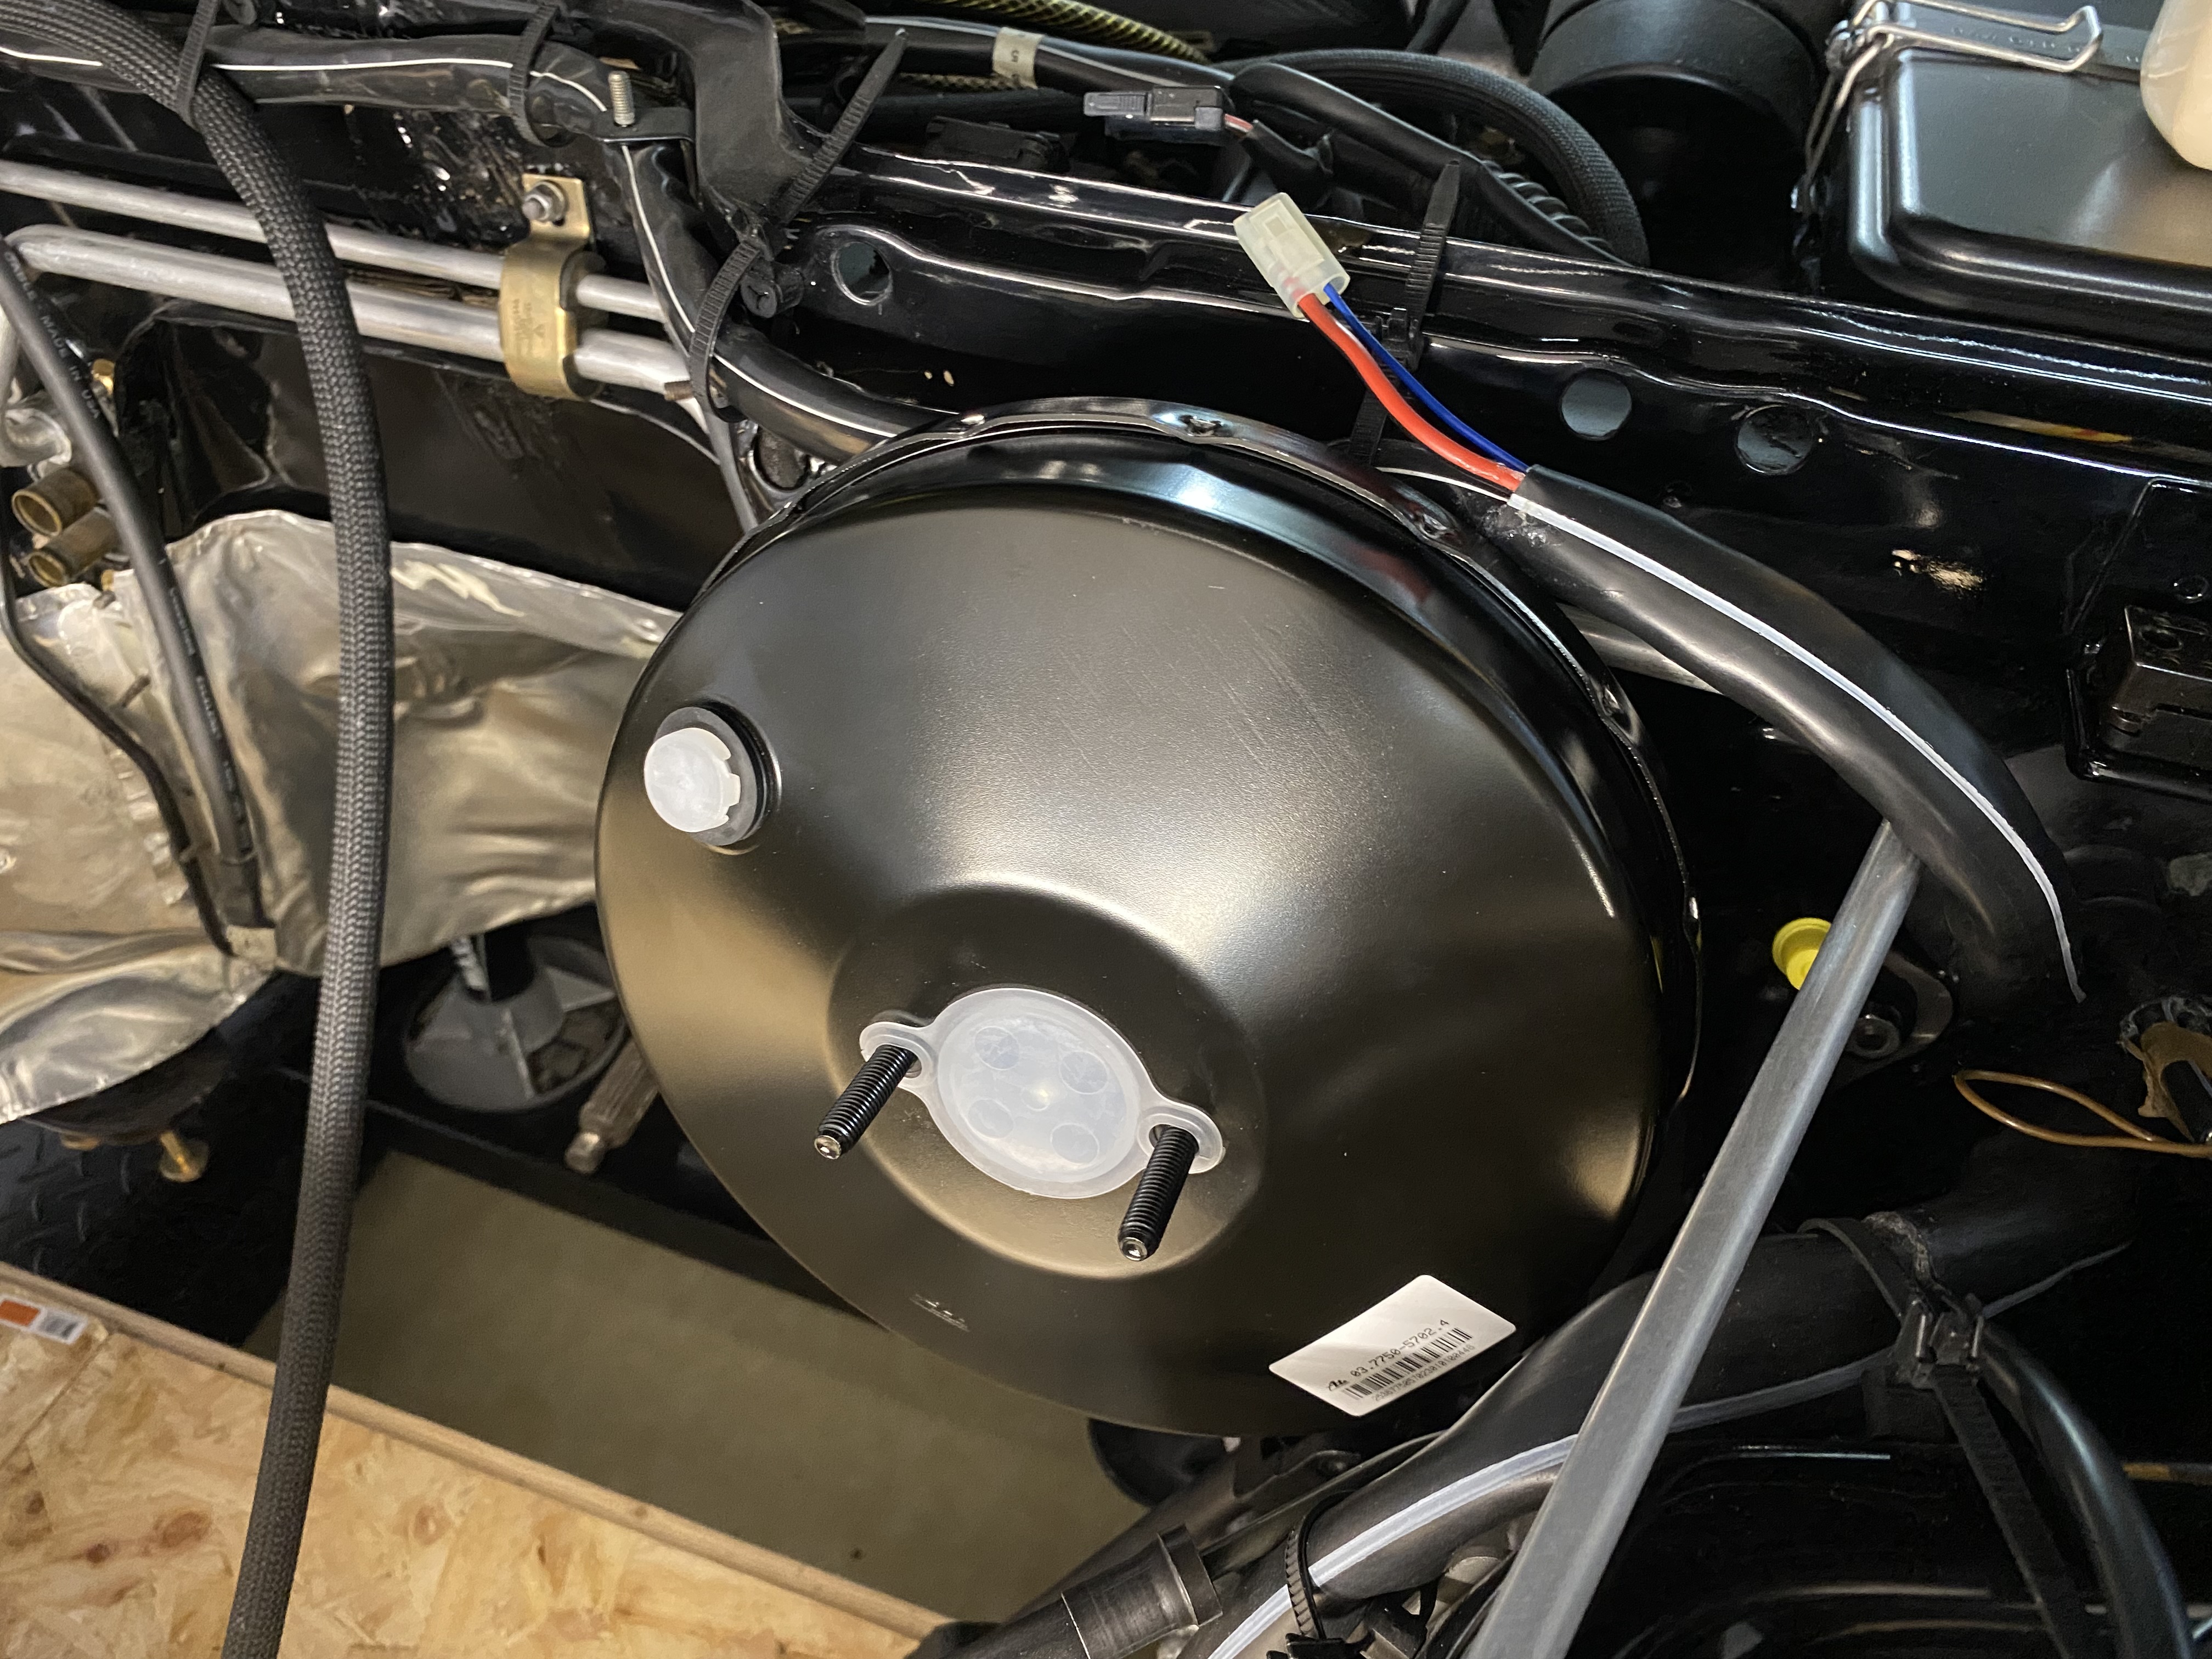
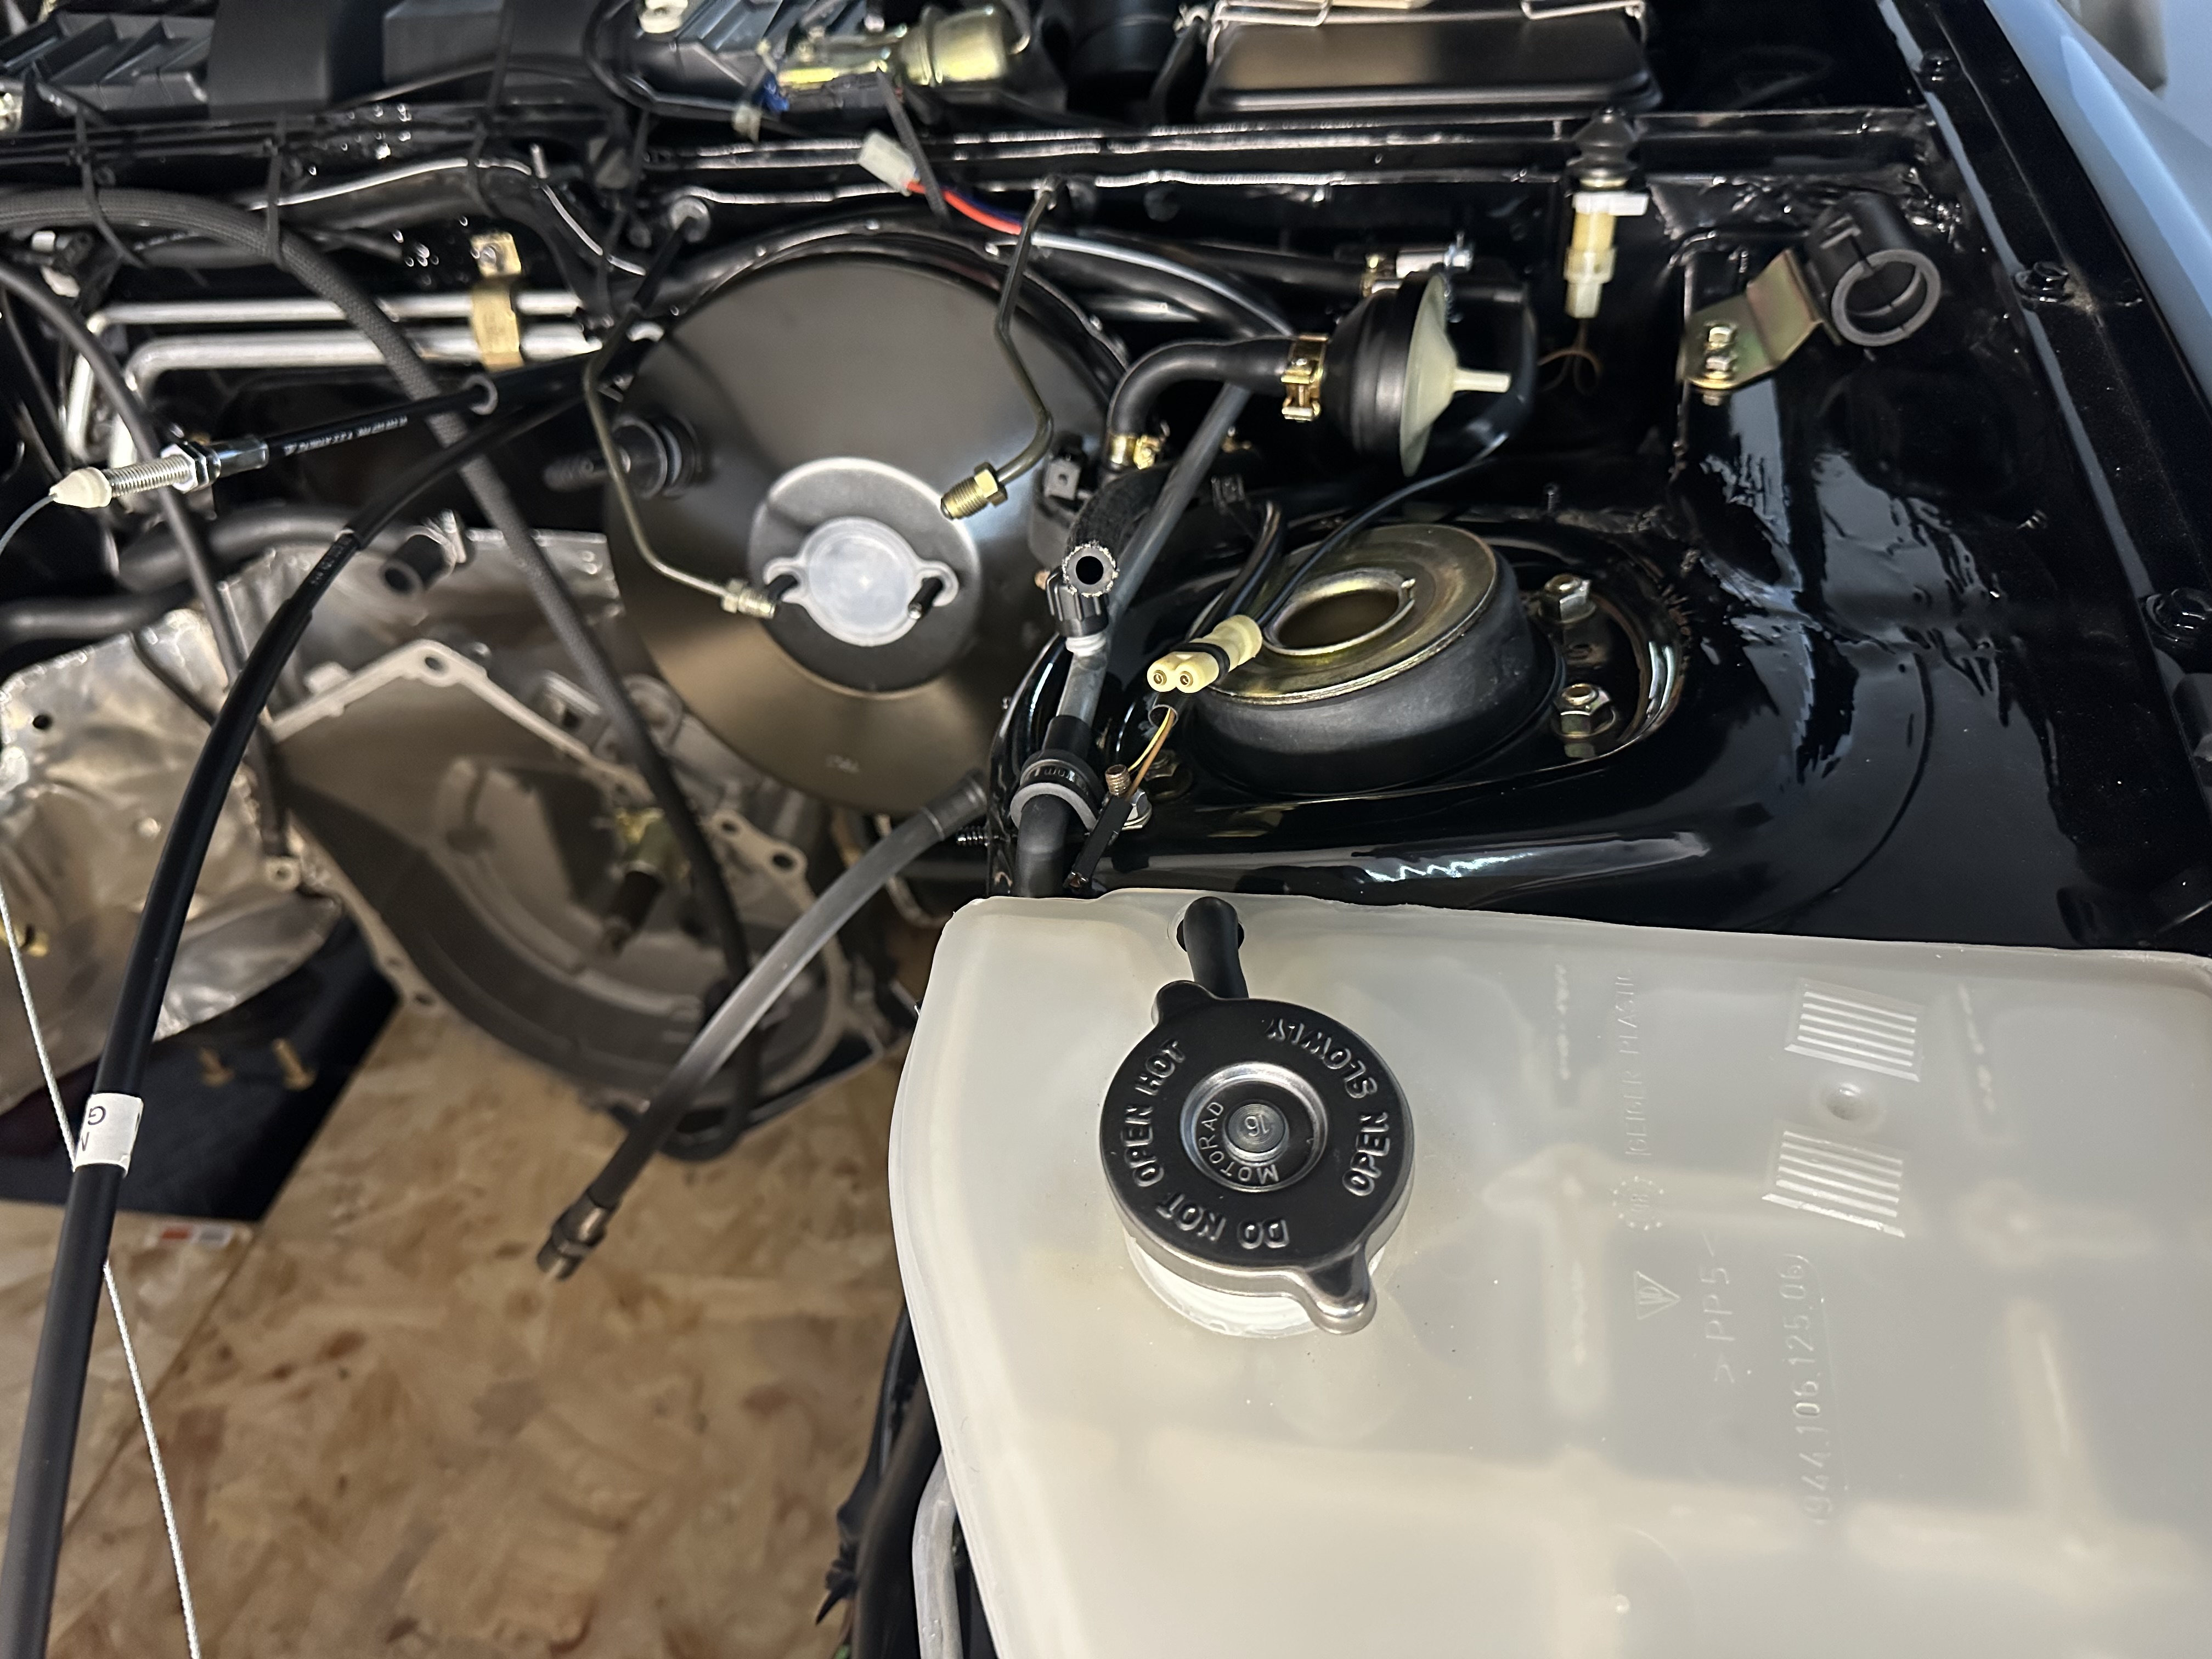
I elected to put in a new ATE master cylinder and decided to include a new ATE booster. The original booster was Girling, and it seems that is should be OK to mix it with an ATE master, but I wanted to be “super safe” I guess… At the same time, the new clutch master went in, along with a Boost Brothers Garage firewall brace.
IMG_9742.JPG
IMG_9742.JPG (3.38 MiB) Viewed 2464 times
IMG_9736.JPG
IMG_9736.JPG (2.86 MiB) Viewed 2464 times
Odds and ends done on the engine included installing the hall sensor and the heater control valve and piping.
IMG_0031.JPG
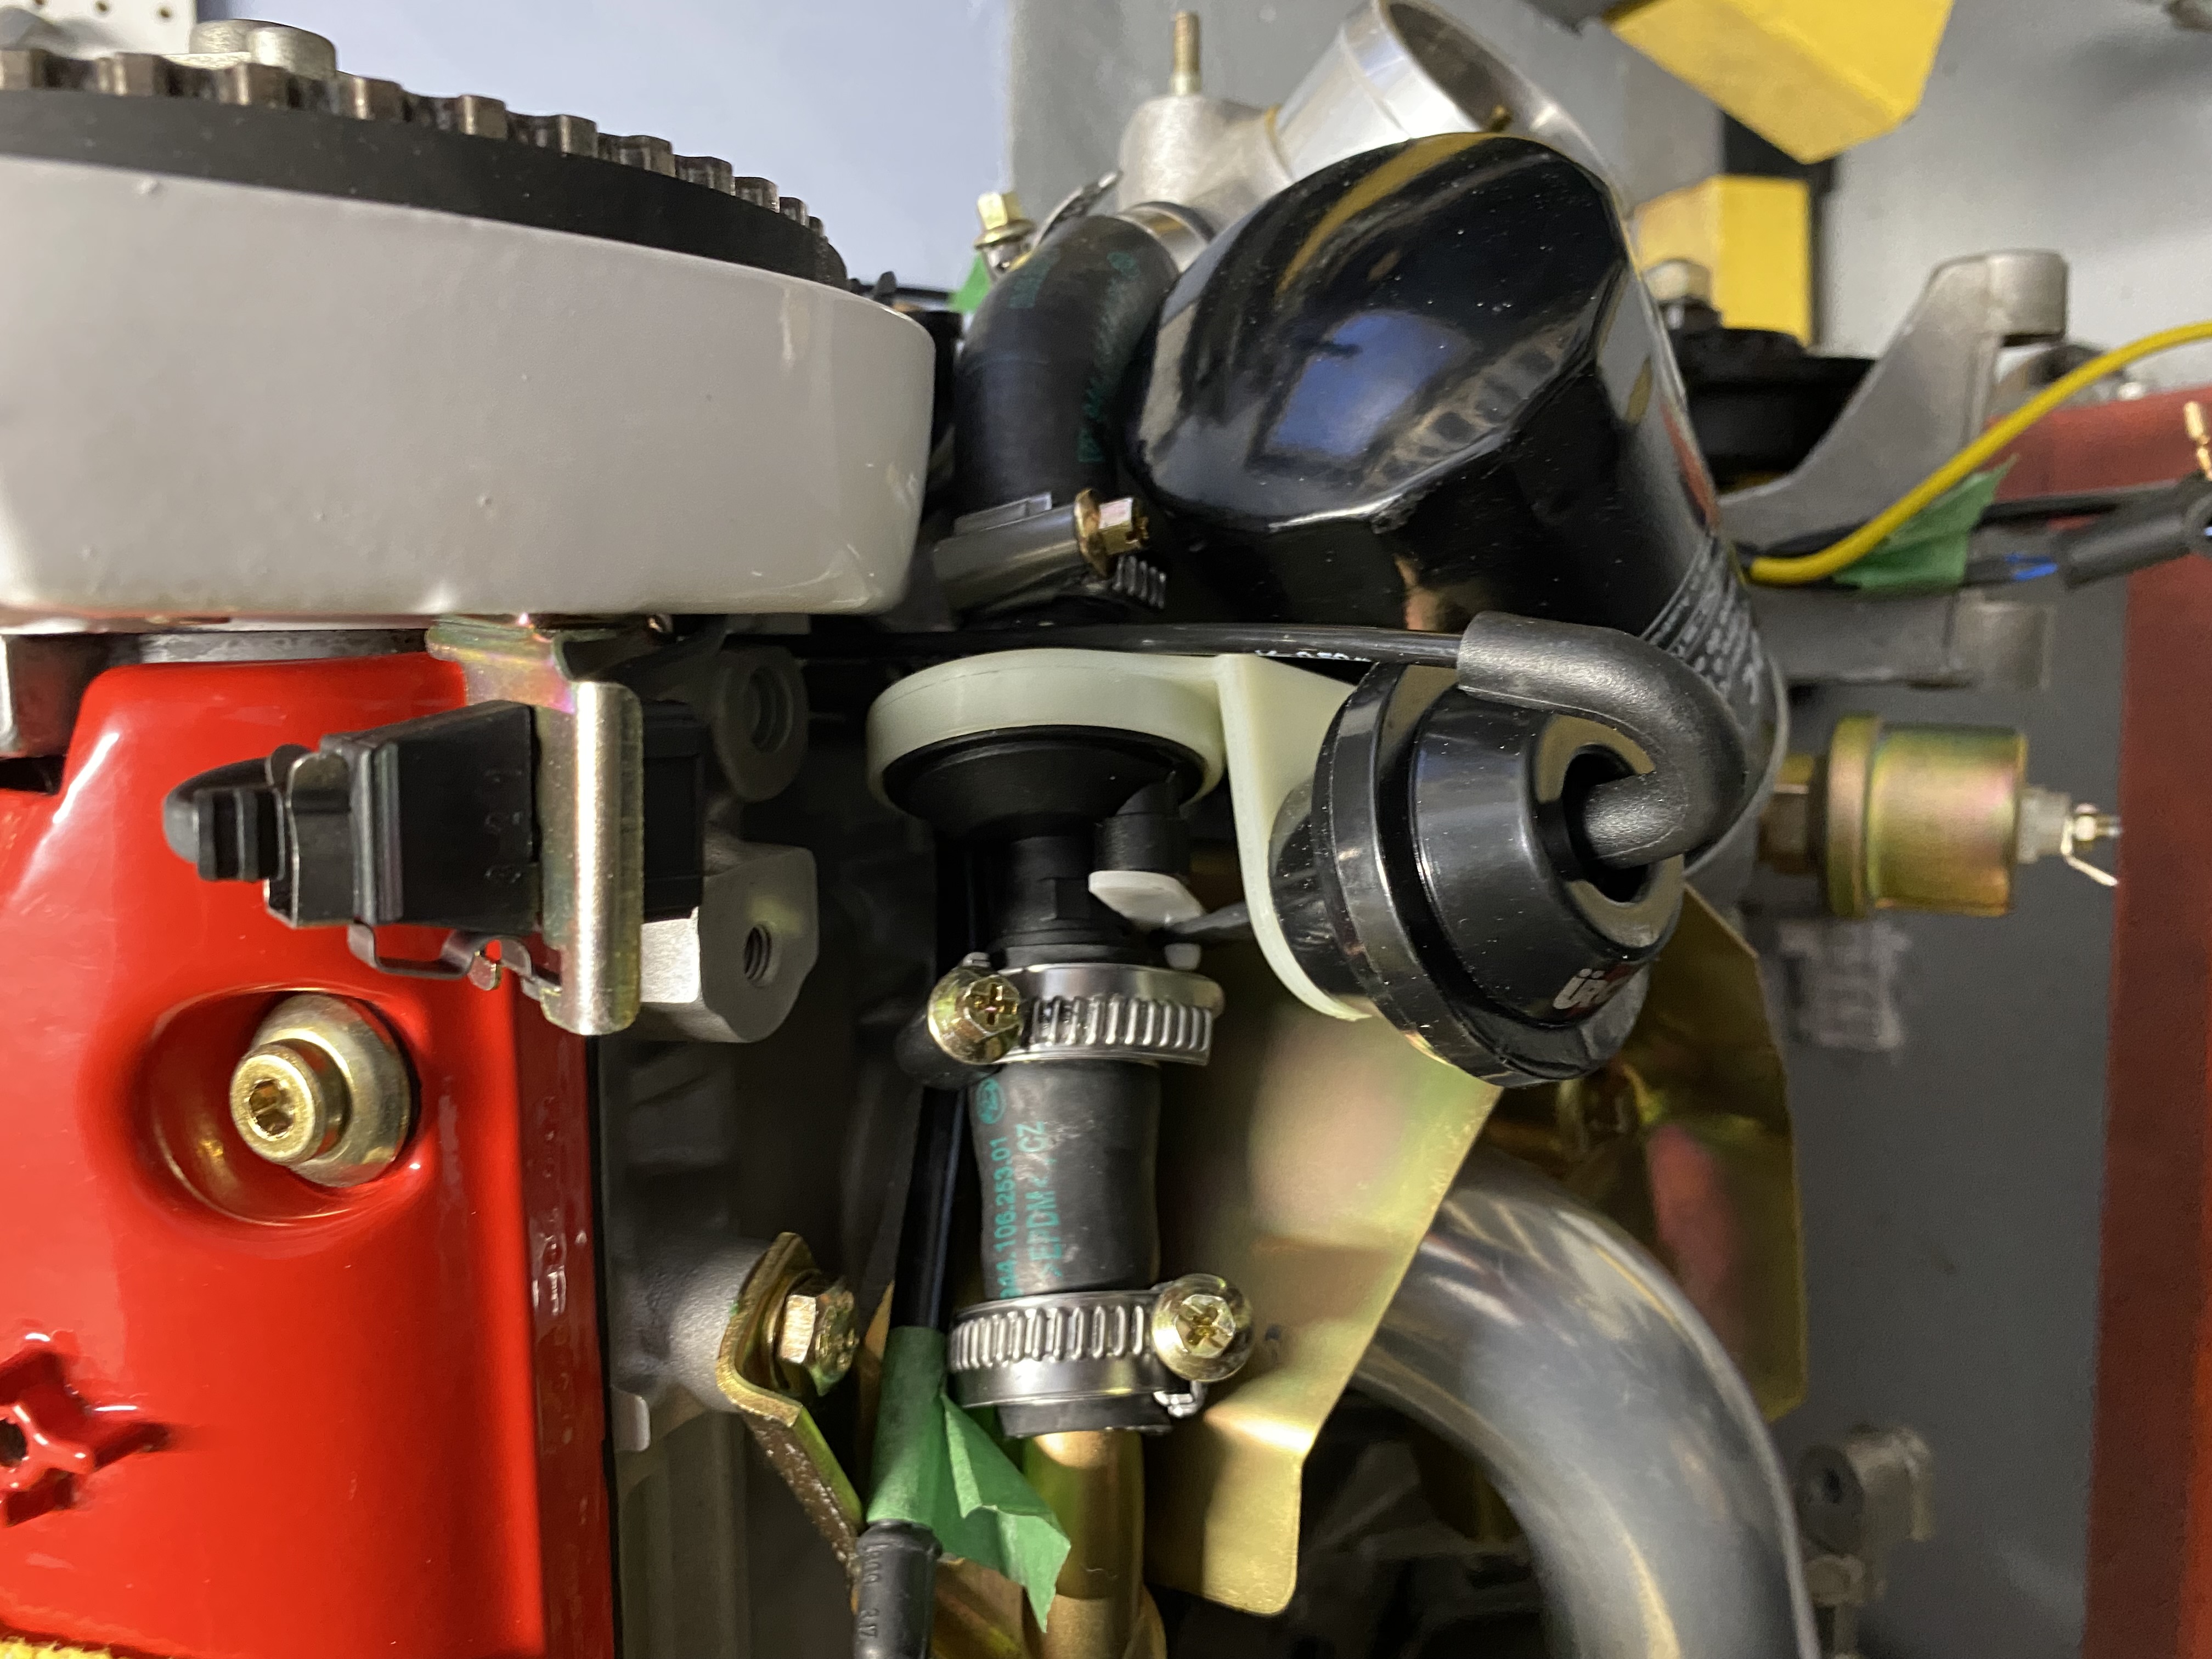
IMG_0031.JPG (2.64 MiB) Viewed 2464 times
IMG_9946.JPG
IMG_9946.JPG (3.28 MiB) Viewed 2464 times
Gradually I have been filling in the various cables, hoses AC lines etc.
IMG_0105.JPG
IMG_0105.JPG (2.72 MiB) Viewed 2464 times
The only part of the original AC system I will be using is the evaporator. As such, I replaced the expansion valve as I had to take the original out to be able to flush the evaporator.

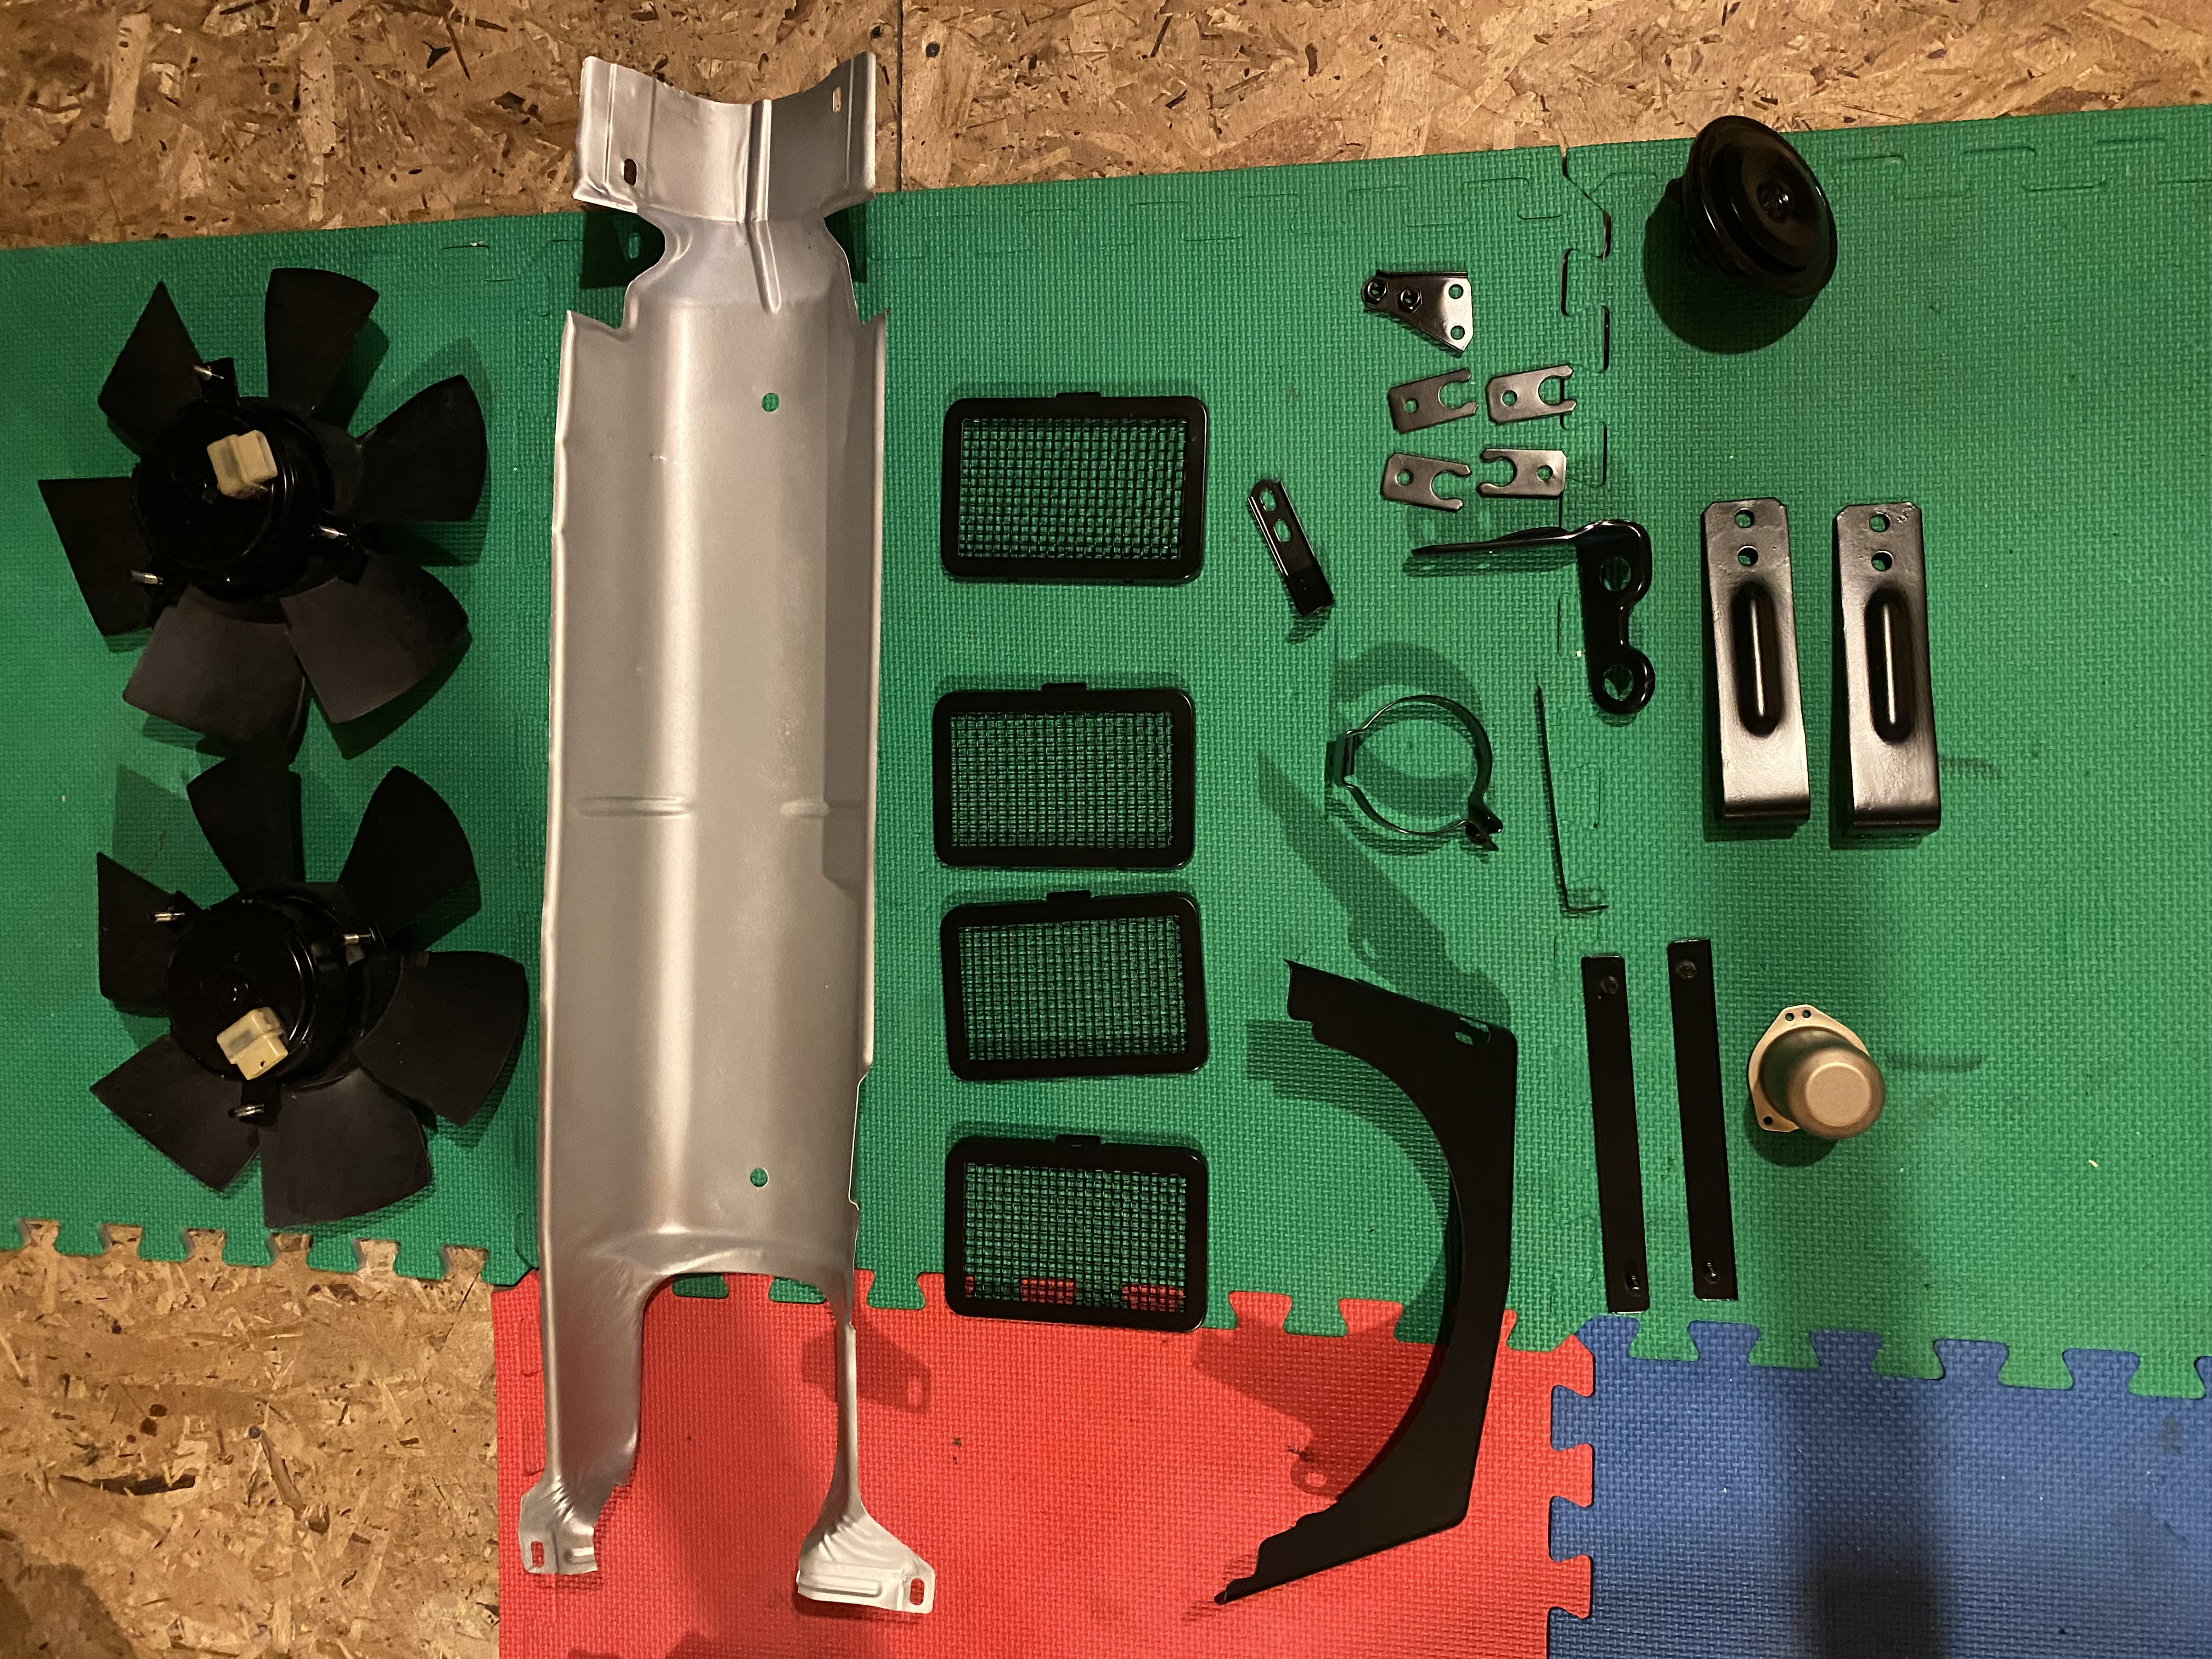
Had a bunch of small parts still to be refinished, so I painted those with 2K epoxy primer and 2K satin topcoats.
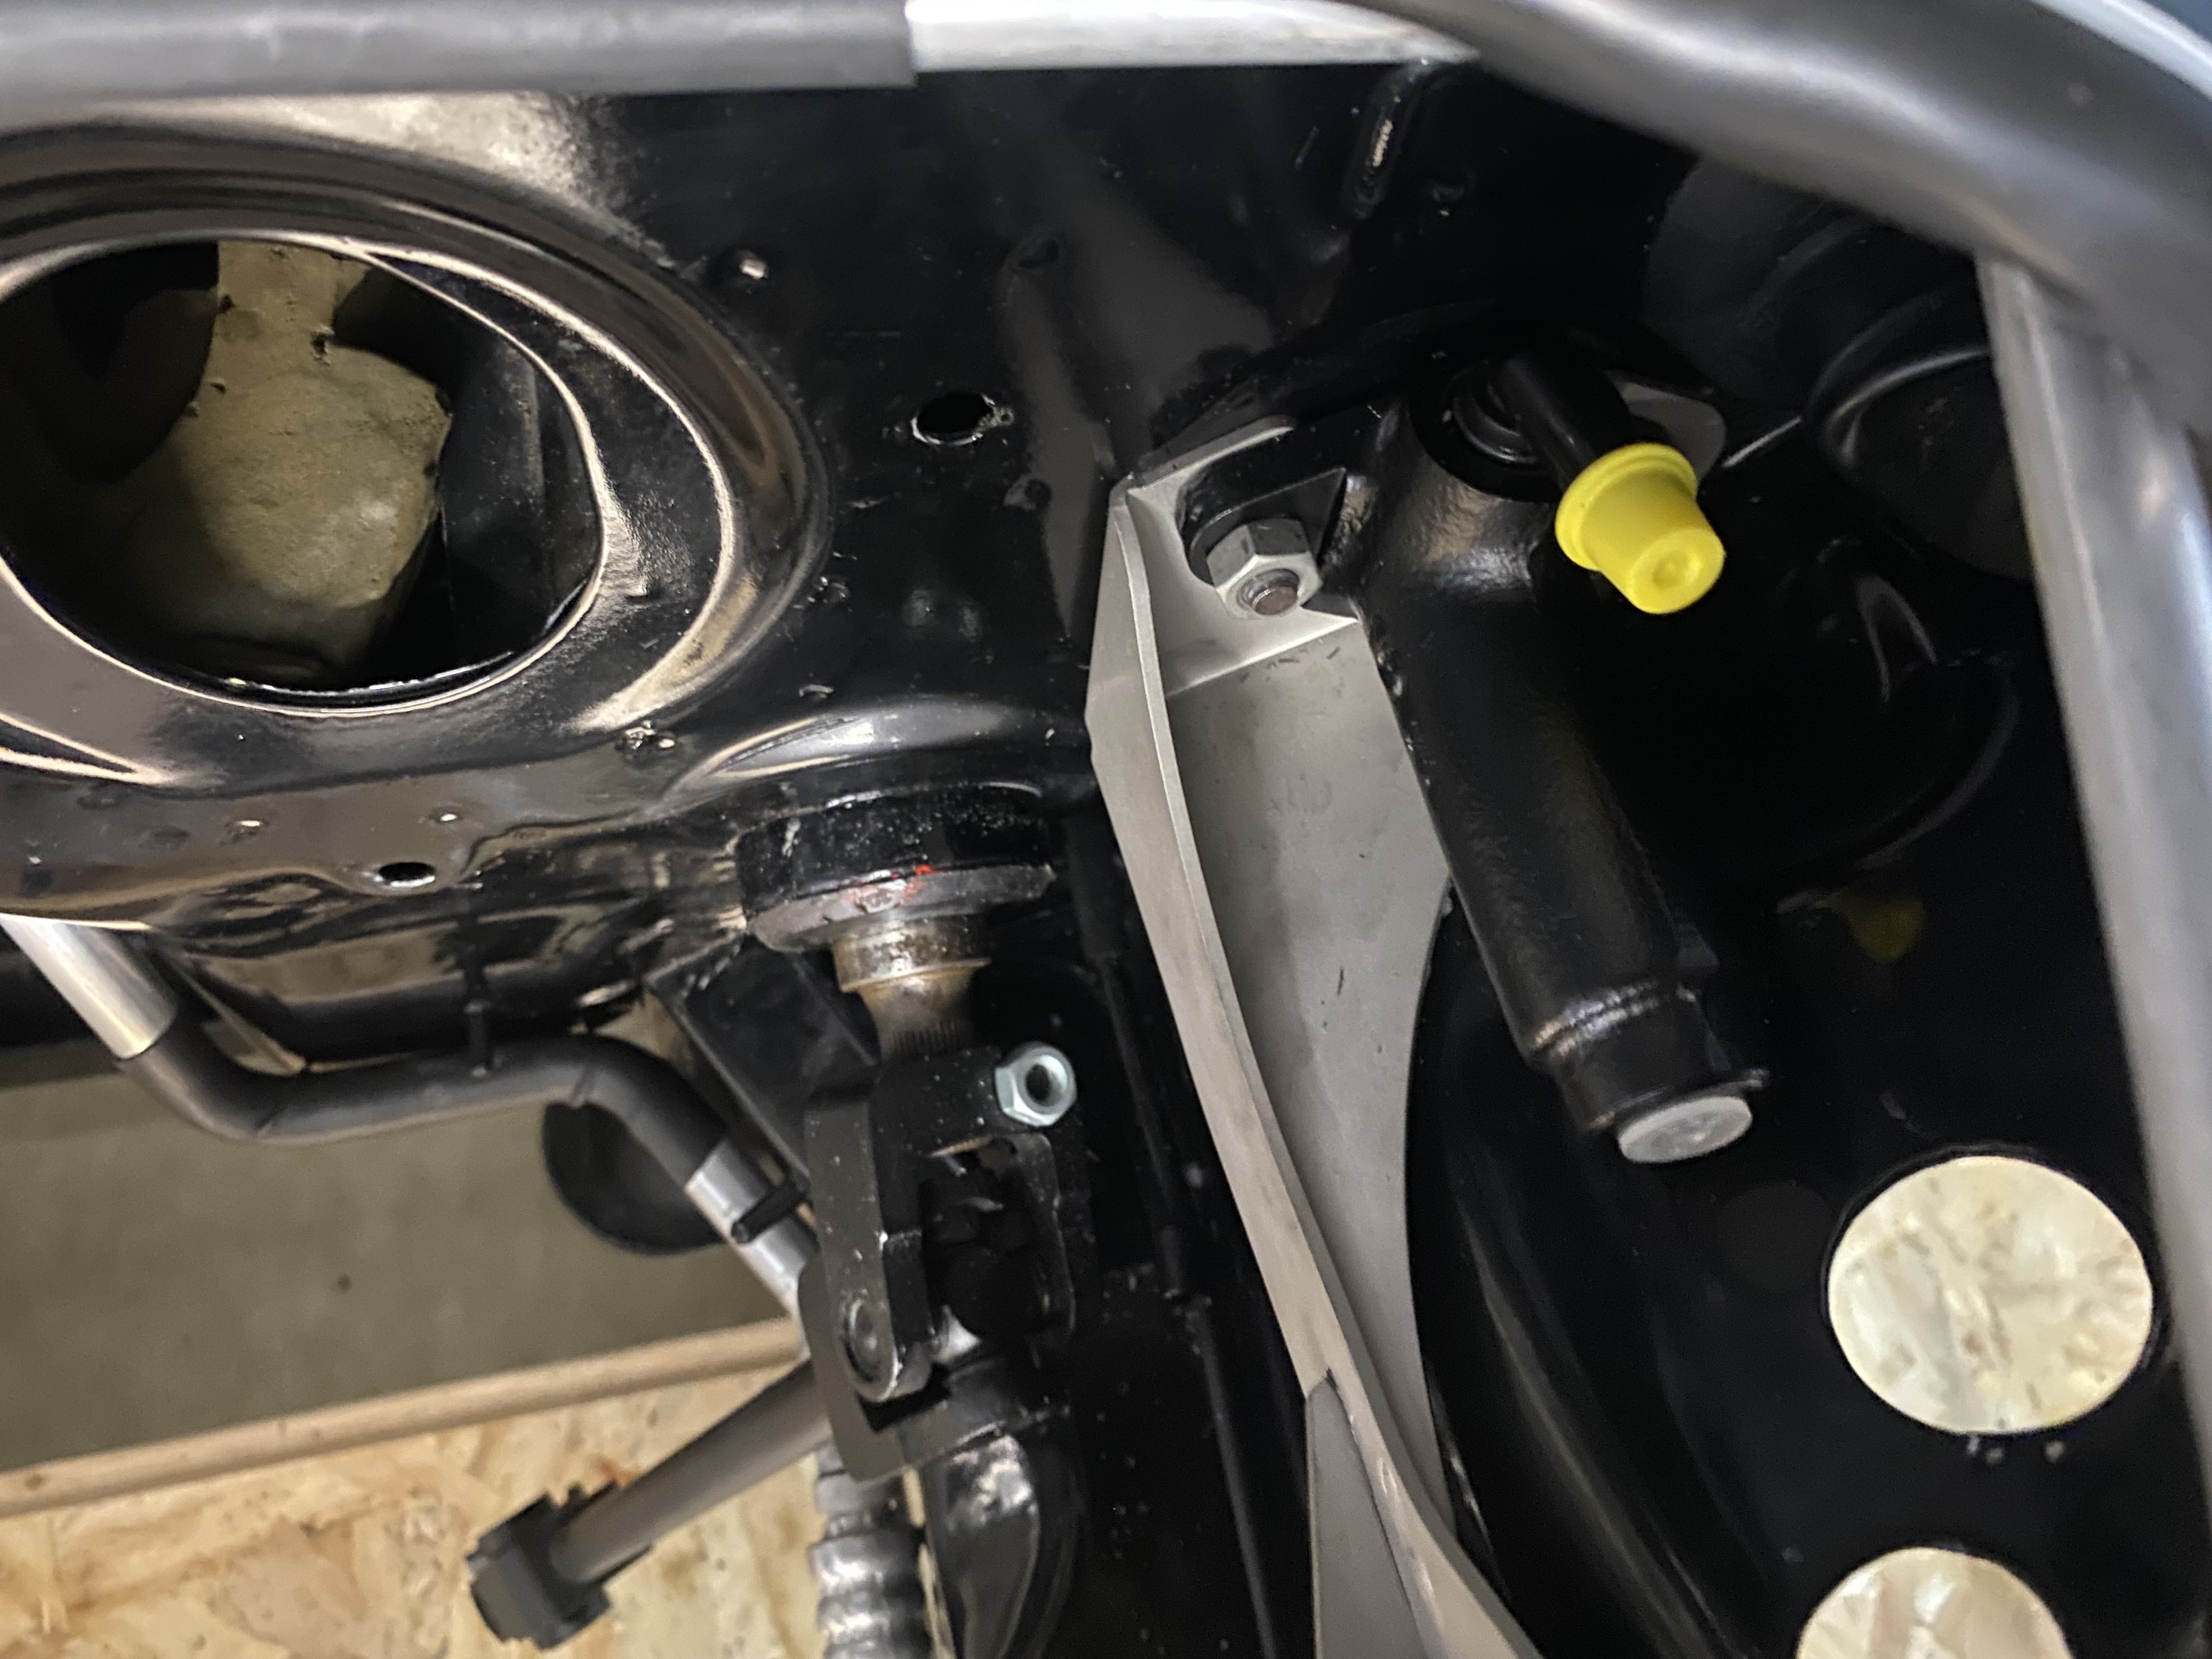
Similarly, I repainted the new manual steering rack components as the factory paint did not look super tough.
IMG_0021.JPG
IMG_0021.JPG (4.32 MiB) Viewed 2464 times
IMG_0214.jpg
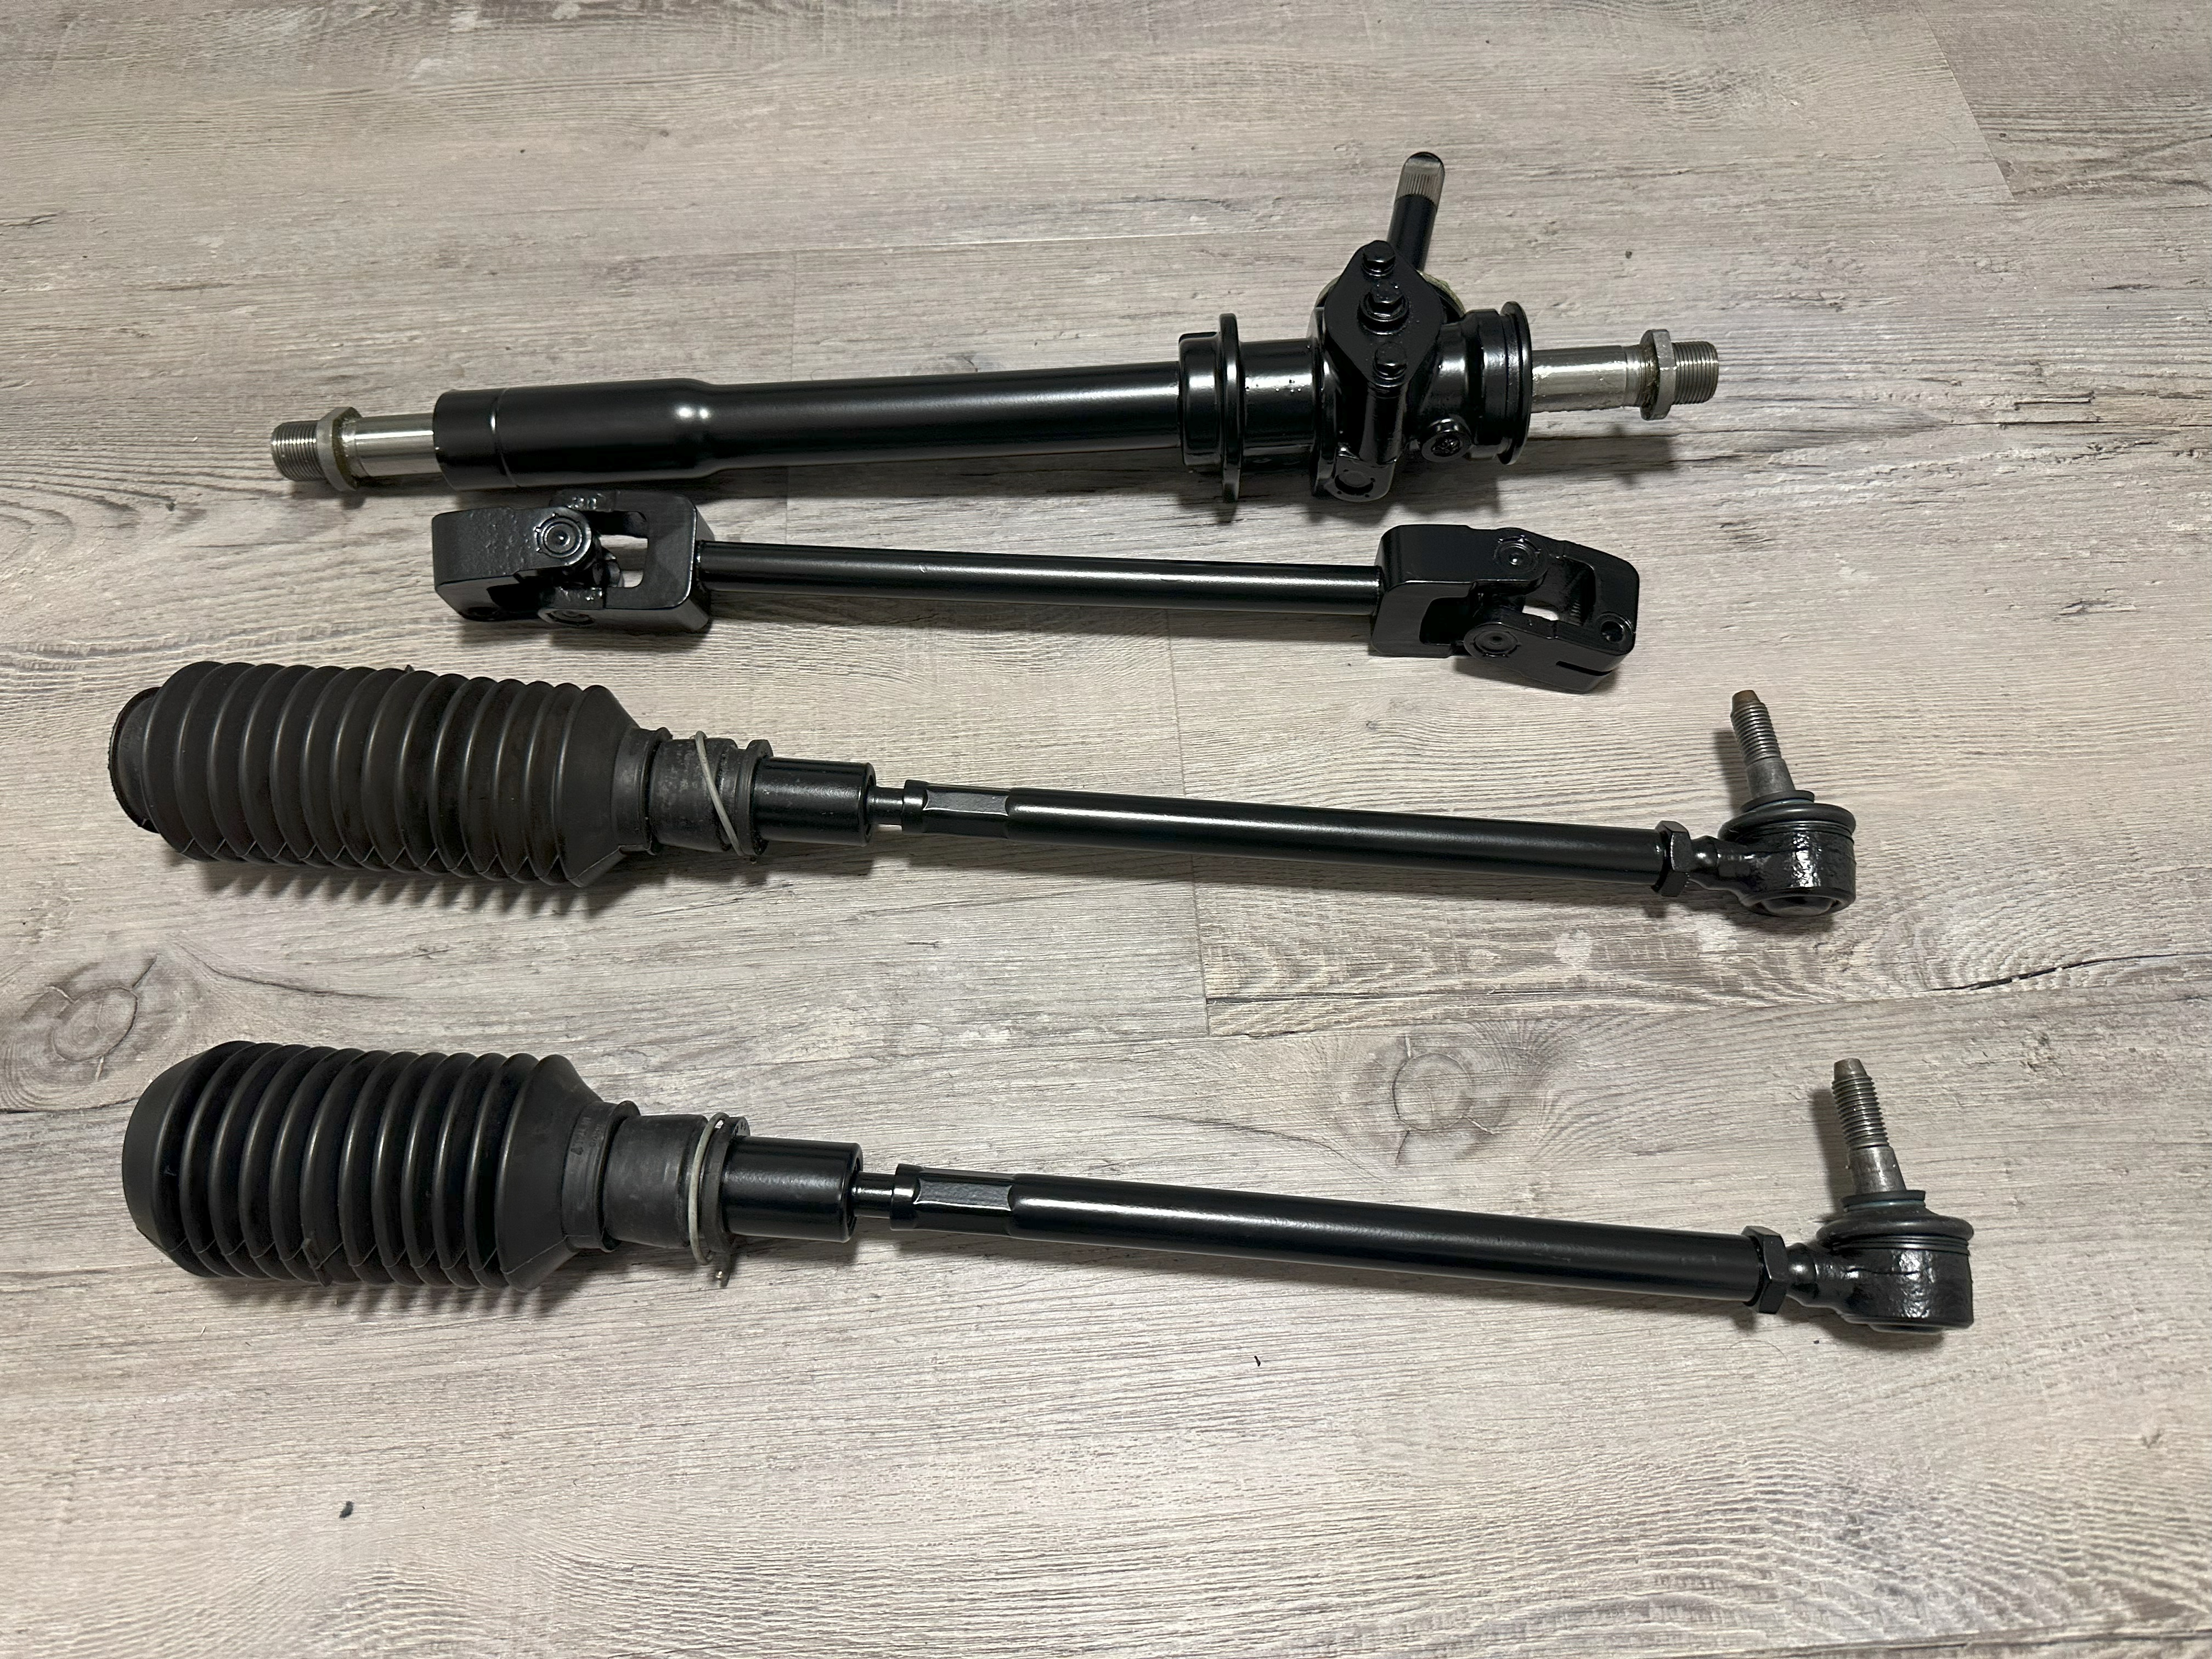
IMG_0214.jpg (4.27 MiB) Viewed 2464 times
Also stuck the front spoiler on and the side markers.
IMG_0109.JPG
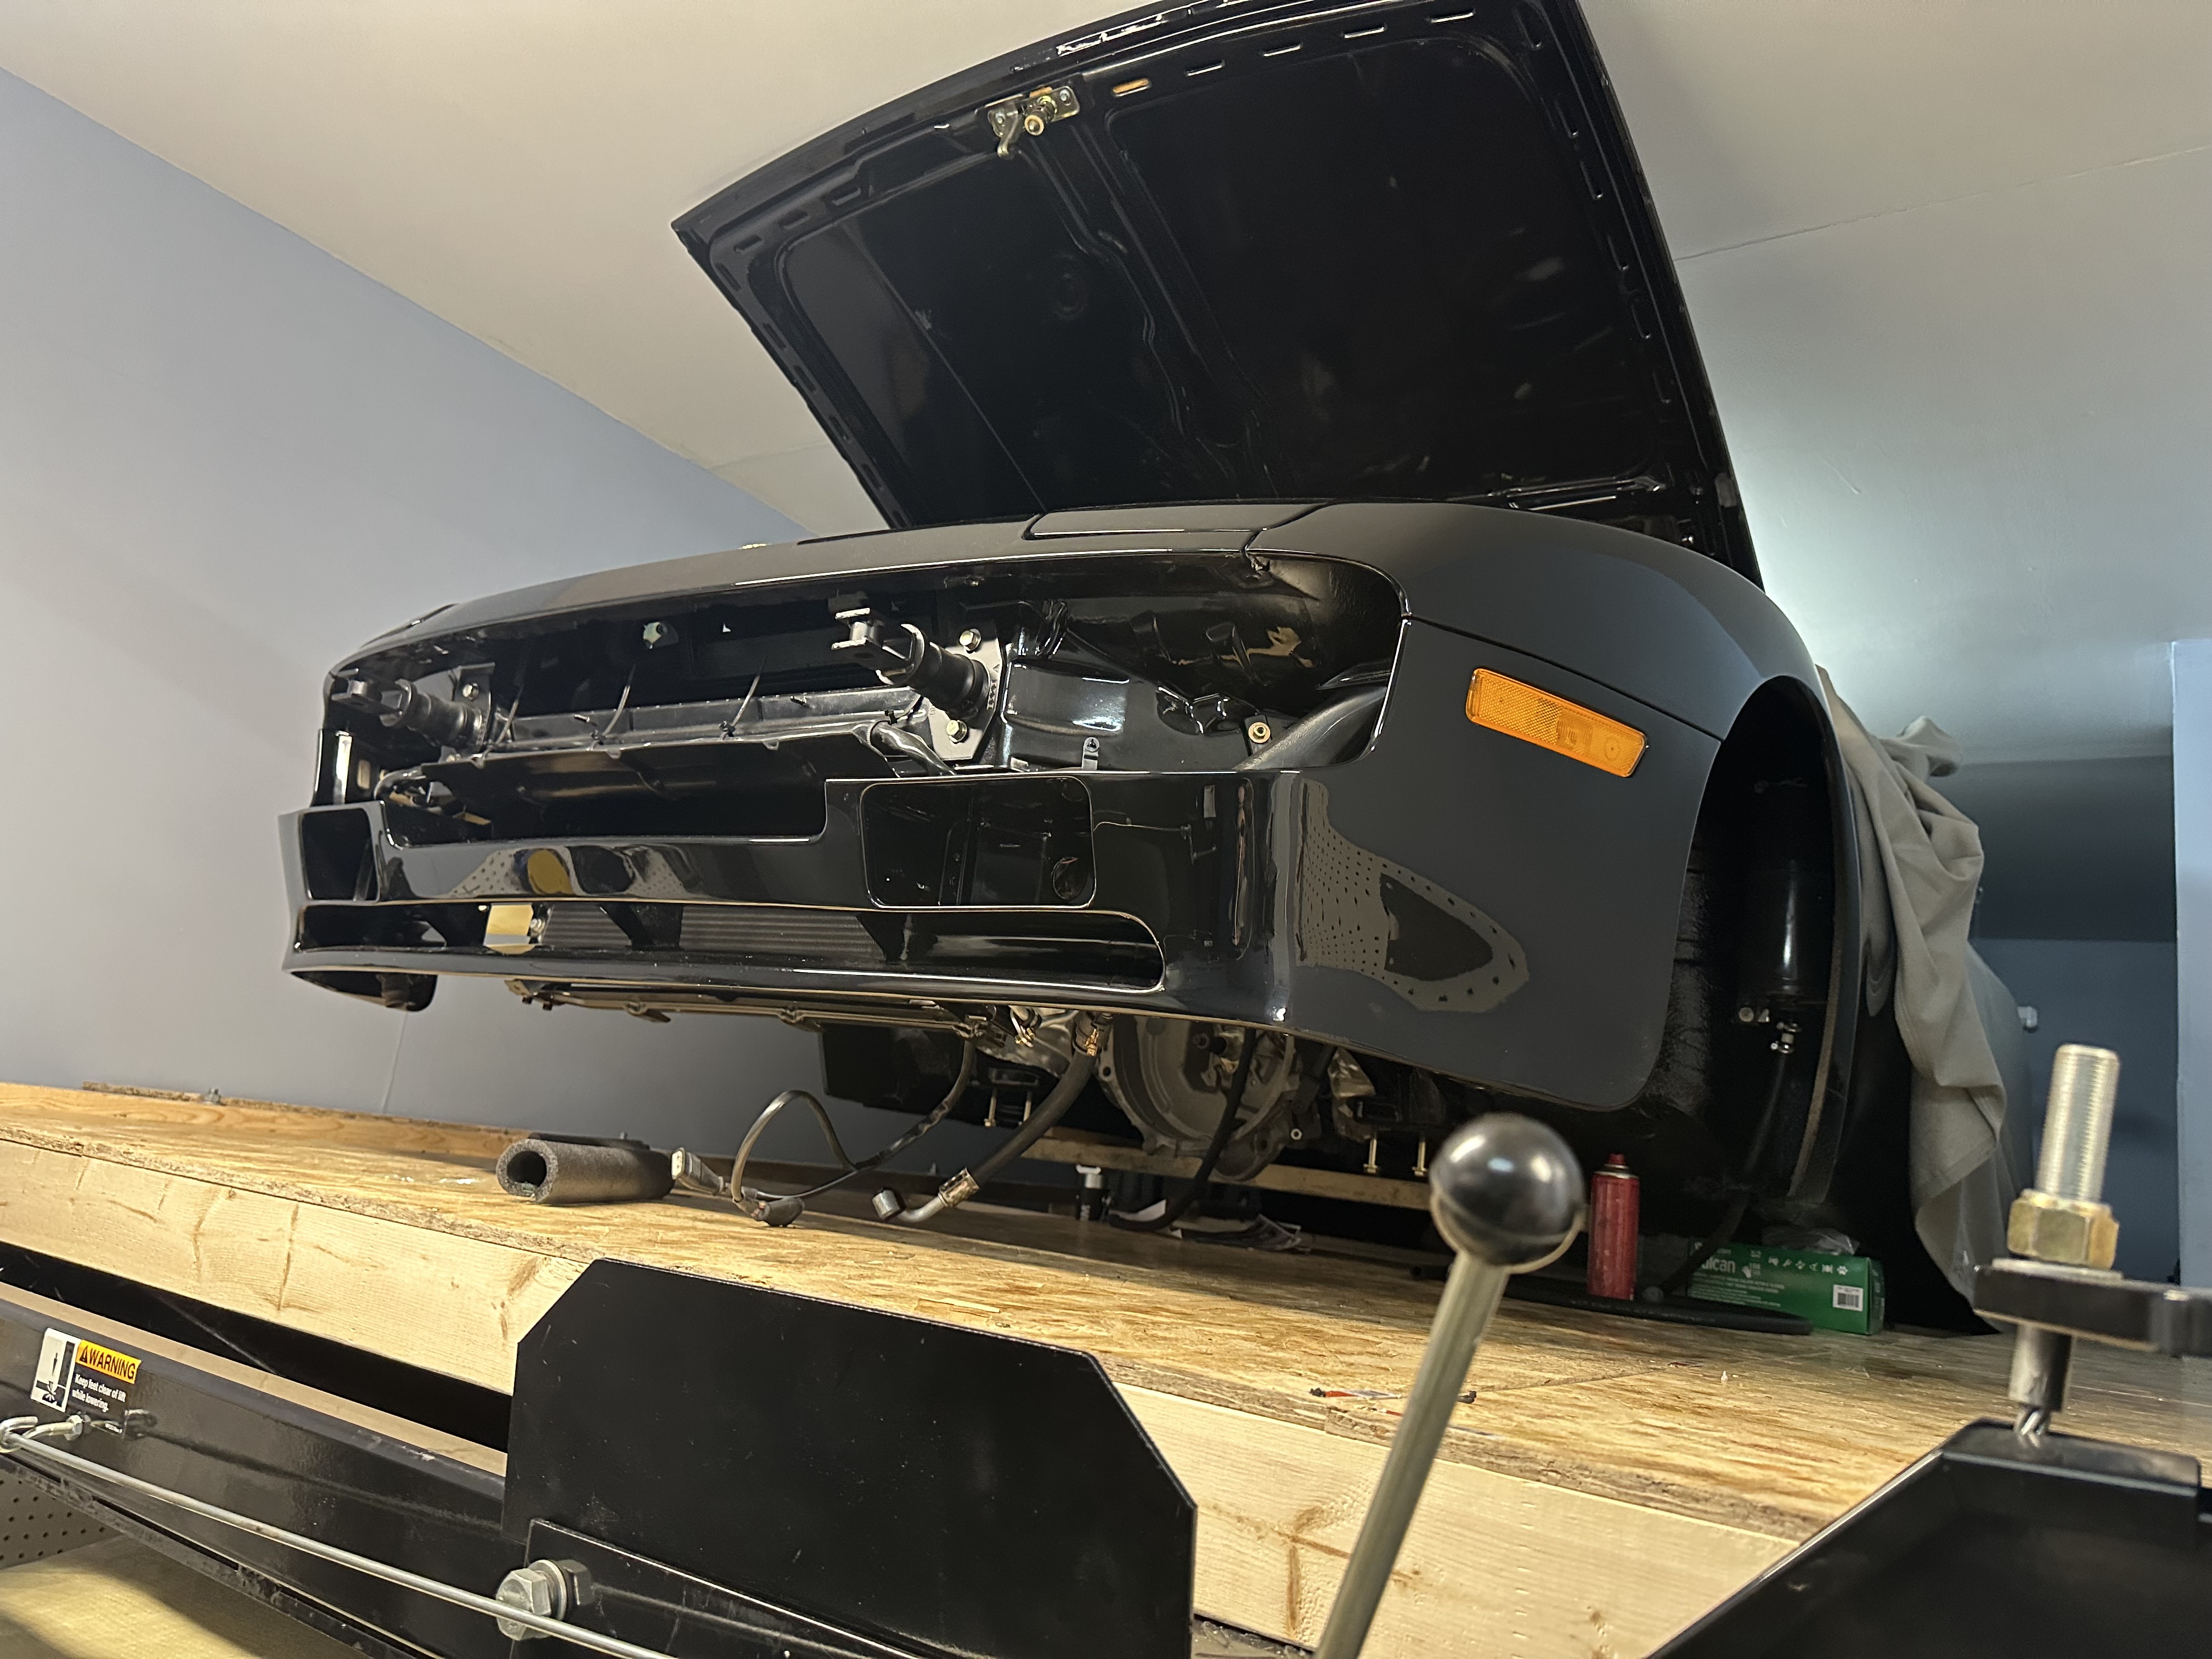
IMG_0109.JPG (3.04 MiB) Viewed 2464 times
Last edited by 500 on Thu Feb 29, 2024 7:42 am, edited 1 time in total.

#29

User avatar
Tom
Site Admin
Posts: 8912
Joined: Fri Jun 25, 2021 2:04 pm
Location: Silicon Valley, CA
Has thanked: 931 times
Been thanked: 3988 times
Contact:
Now have I missed this until now! Amazing work and soooo clean! This one's going in the #newsletter!

#30

Post Reply