


Who has rebuilt their G Body Axles?
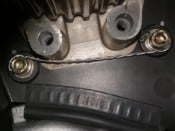
Has anyone done their own Axle rebuilds? I pulled mine so I can remove engine and Transaxle. And they look original 40 yrs old and 70+ k on them. They are leaking. Just curious if it’s a fairly easy job
- Add Pictures/Files
-
- IMG_6927.jpeg (2.96 MiB) Viewed 1268 times
Jim
Current
1984 911 Carrera Targa 3.2
Past
1969 911T 2.0
Western Ma.
USA.
Current
1984 911 Carrera Targa 3.2
Past
1969 911T 2.0
Western Ma.
USA.

They can be rebuilt if the joints are in good condition and have no wear. Disassemble, clean all parts, inspect. If you need new joints, some time it's cheaper just to buy new assemblies ready to install.
If you decide to disassemble mack sure you keep the joints and cages together. Clean the shafts so there is no grease left, grid blast and powder coat or paint, get new booths and seals for the joints. Assemble and re-install with new grease. Make sure the socket head bolts are in good shape.
Cheers
Engelbert
LED lights for classic Porsches http://carmagic.us/
-
icb
- Posts: 150
- Joined: Mon Aug 07, 2023 9:09 am
- Location: Dayton, Ohio
- Has thanked: 59 times
- Been thanked: 54 times
- Contact:
This is an easy job if you normally work in a methodical manner, have the right tools (largish 4-inch or larger vice, Eaton style snap ring pliers, small pin punch approx 3-4 mm wide, ball peen hammer), and keep the sections of the joint in the correct order/relationship. There are a few good utube videos, like Van Svenson's and a couple of other VW channels; watch a couple of those and you'll have no problem.
Your bolts may well have originally been xzn head bolts.
Your bolts may well have originally been xzn head bolts.
-
Dave Lagerstrom

- Posts: 3
- Joined: Tue Apr 18, 2023 9:14 am
Straight forward job. Pelican has OEM spec kits with boot, snap rings, seal, and grease for a little over $50 each.
Get ready for a mess. Lots of grease. I have one old T-shirt that will always have the stain from the last time I did this.
If you have a parts washer it will make the cleaning much easier.
Good luck.
-Dave in Minnesota
Get ready for a mess. Lots of grease. I have one old T-shirt that will always have the stain from the last time I did this.
If you have a parts washer it will make the cleaning much easier.
Good luck.
-Dave in Minnesota
-Dave in Minnesota
'60 Super Cab, '67 912
'82 928, '82 Targa
'85.5 944, '96 C4 Cab
'60 Super Cab, '67 912
'82 928, '82 Targa
'85.5 944, '96 C4 Cab
Has anyone swapped their axles to the opposite side. Years ago I read (possibly Bentley Manual) that axles develop a "hand" between the joint and that swapping side for side increase their longevity. Since mine are approaching 100K miles, I'm considering doing that with above Pelican kit. Cheers Socks
-
dr bob
- Moderator
- Posts: 627
- Joined: Thu Jul 08, 2021 9:30 pm
- Location: Central Oregon
- Has thanked: 255 times
- Been thanked: 248 times
FWIW, and from some relatively ancient experience --
The CV joints from the 930 have been a go-to solution in lots of related cars for decades. Typically around $100 each, and they get fitted to your existing axles. They are stronger than those fitted to the rest of the cars. If you have concern about wear in your existing joints, it might make sense to use the higher-grade parts.
On swapping left and right, there's a small justification if the old joints were driven extra hard, and particularly if they ran a little dry. Look for scuffing and pitting on the balls, blue or visibly damaged races where the balls ride. The cages need to be good, with no visible wear except maybe a little scuffing on the black finish in the holes. At the same time, the axle stays centered/aligned only when both faces of each grooved section are worn evenly. You might mask part of a high-wear imbalance issue, but only part of it. By the time I can see or fell wear, it's time to replace the joints. Know that they come in different spline-counts, so shop carefully.
I mark the pieces with file scuffs or -maybe- punch marks, draw a diagram, and use an egg container to keep track of each ball and the races each rides in. That's if I need to disassemble them. Most often, 'service' is not much more than a thorough cleaning, then new grease and new boot. Paper towels are good for getting as much grease out as possible. I put a couple large cable ties through the joint to hold it together, fill a plastic coffee container with enough paint thinner (deodorized mineral spirits) to cover the joint. Then let it soak for a while with an occasional shake, until the old grease is removed. It may take a couple soak-shake soak-shake efforts to get them clean while still assembled, but it's a lot easier than trying to keep track of every part and location for reassembly. Once it's clean you'll be able to manipulate the pieces enough to identify fatal wear.
Since the last time I did a CV joint service I've added an ultrasonic cleaner to my tool collection, and would probably use it at least for final cleaning. Same paint thinner in a Ziploc bag with the joint, then the bag into hot water filling the cleaner.
The contaminated solvent gets disposed of with used motor oil here.
I use a large vintage 'wheel bearing packer' to force the new grease through the cleaned and inspected CV joints. Wear gloves while you handle the grease, and bag (more Ziploc bags) the assembled and greased joints until you are ready to install them on the freshly cleaned and painted axles and the car.
Waste no time with cheap rubber boots and clamps. And use the correct tool to crimp the band clamps.
dr bob
1989 928 S4, black with cashmere/black inside
SoCal 928 Group Cofounder
928 Owner's Club Charter Member
Former Ex Bend Yacht Club Commodore Emeritus
Free Advice and Commentary. Use At Your Own Risk!
1989 928 S4, black with cashmere/black inside
SoCal 928 Group Cofounder
928 Owner's Club Charter Member
Former Ex Bend Yacht Club Commodore Emeritus
Free Advice and Commentary. Use At Your Own Risk!