Get a better experience by installing our free app!
Not now
Install
Get a better experience by installing our web app!
Hide
How to do it?
In Safari, tap on the menu bar. Scroll down the list of options, then tap Add to Home Screen.(If you don’t see Add to Home Screen, you can add it. Scroll down to the bottom of the list, tap Edit Actions, then tap Add to Home Screen.)
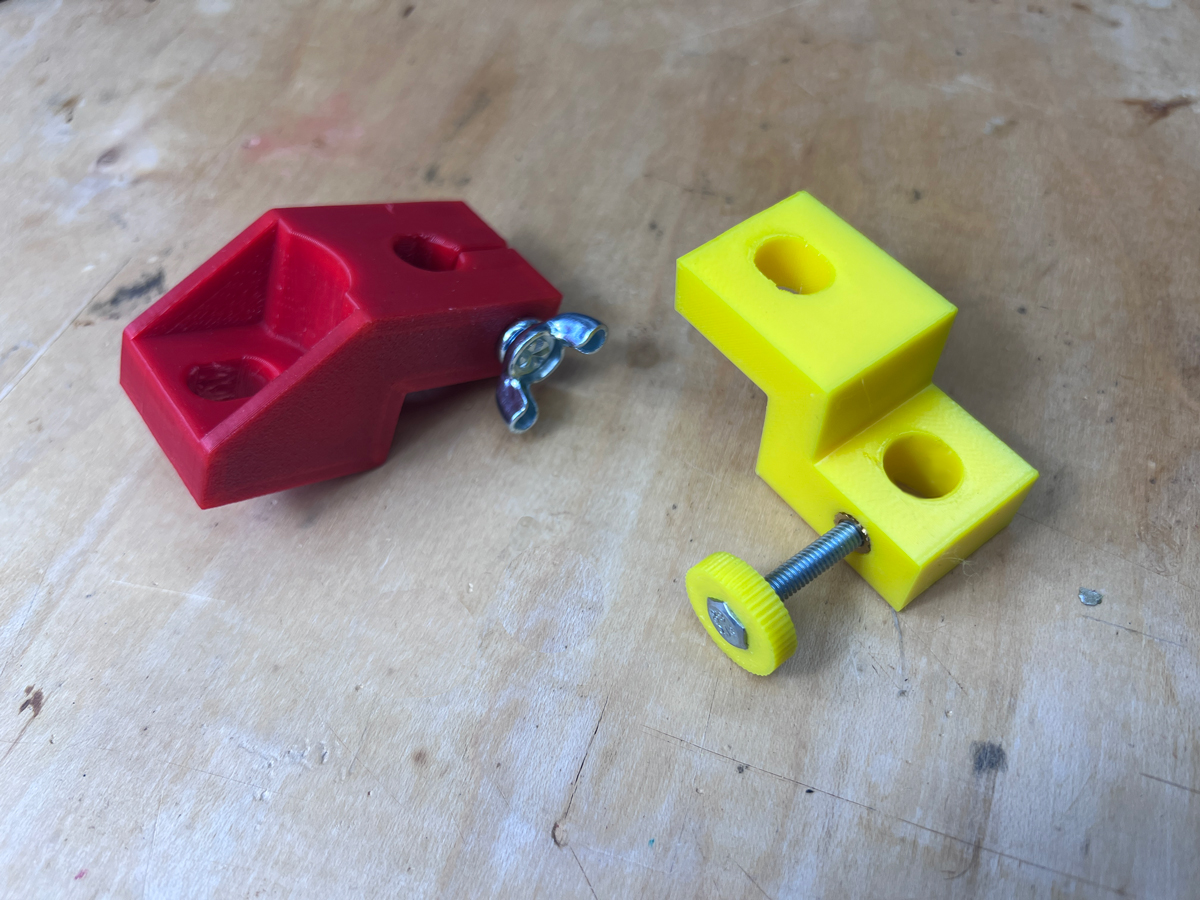
Here are files for a 3D-Printed Z-block fixture, for the air-cooled 911 crowd. I’m posting two versions. The one named Zblock EZ, shown in Red below, can be assembled with regular hardware store parts. The other, shown in yellow, requires a heat-set brass insert from McMaster Carr. Both of these tools serve the purpose of the factory P207 tool, to adjust valves, set cam timing, measure piston to valve clearance, etc. These work with standard dial indicators with 3/8” mounting posts, and may need a short extension on the dial indicator.
The yellow one uses a short M4 x 0.7 heat-set brass thread insert, item number 94459A150 at McMaster-Carr. To install, put the insert on the tip of a soldering iron, then melt them into the hole on the side of the z-block. You can then use a standard M4 x 0.7 bolt to secure the dial indicator in the z-block. If desired, you can also buy an M4 thumb screw, or make one using the M4 thumbscrew 3D-Printer file posted below.
Tom wrote: Sat Jun 17, 2023 1:23 pm
Here are files for a 3D-Printed Z-block fixture, for the air-cooled 911 crowd. I’m posting two versions. The one named Zblock EZ, shown in Red below, can be assembled with regular hardware store parts. The other, shown in yellow, requires a heat-set brass insert from McMaster Carr. Both of these tools serve the purpose of the factory P207 tool, to adjust valves, set cam timing, measure piston to valve clearance, etc. These work with standard dial indicators with 3/8” mounting posts, and may need a short extension on the dial indicator.
The yellow one uses a short M4 x 0.7 heat-set brass thread insert, item number 94459A150 at McMaster-Carr. To install, put the insert on the tip of a soldering iron, then melt them into the hole on the side of the z-block. You can then use a standard M4 x 0.7 bolt to secure the dial indicator in the z-block. If desired, you can also buy an M4 thumb screw, or make one using the M4 thumbscrew 3D-Printer file posted below.